🎉
Welcome aboard,
It's nice to have you here!
Before starting adding new ROMs into your library, please follow the next steps to enable the connectivity between RetroX and Google Drive.
After completion, a folder named 'Retrox' will be created in your Google Drive. This folder will be used to store all the games you add.
Note: RetroX will NOT have access to your personal files. The following steps will allow this app to have permissions limited to managing the RetroX folder.
🚀
Let's start!
- Go to https://console.cloud.google.com/apis and log in with your Google credentials.
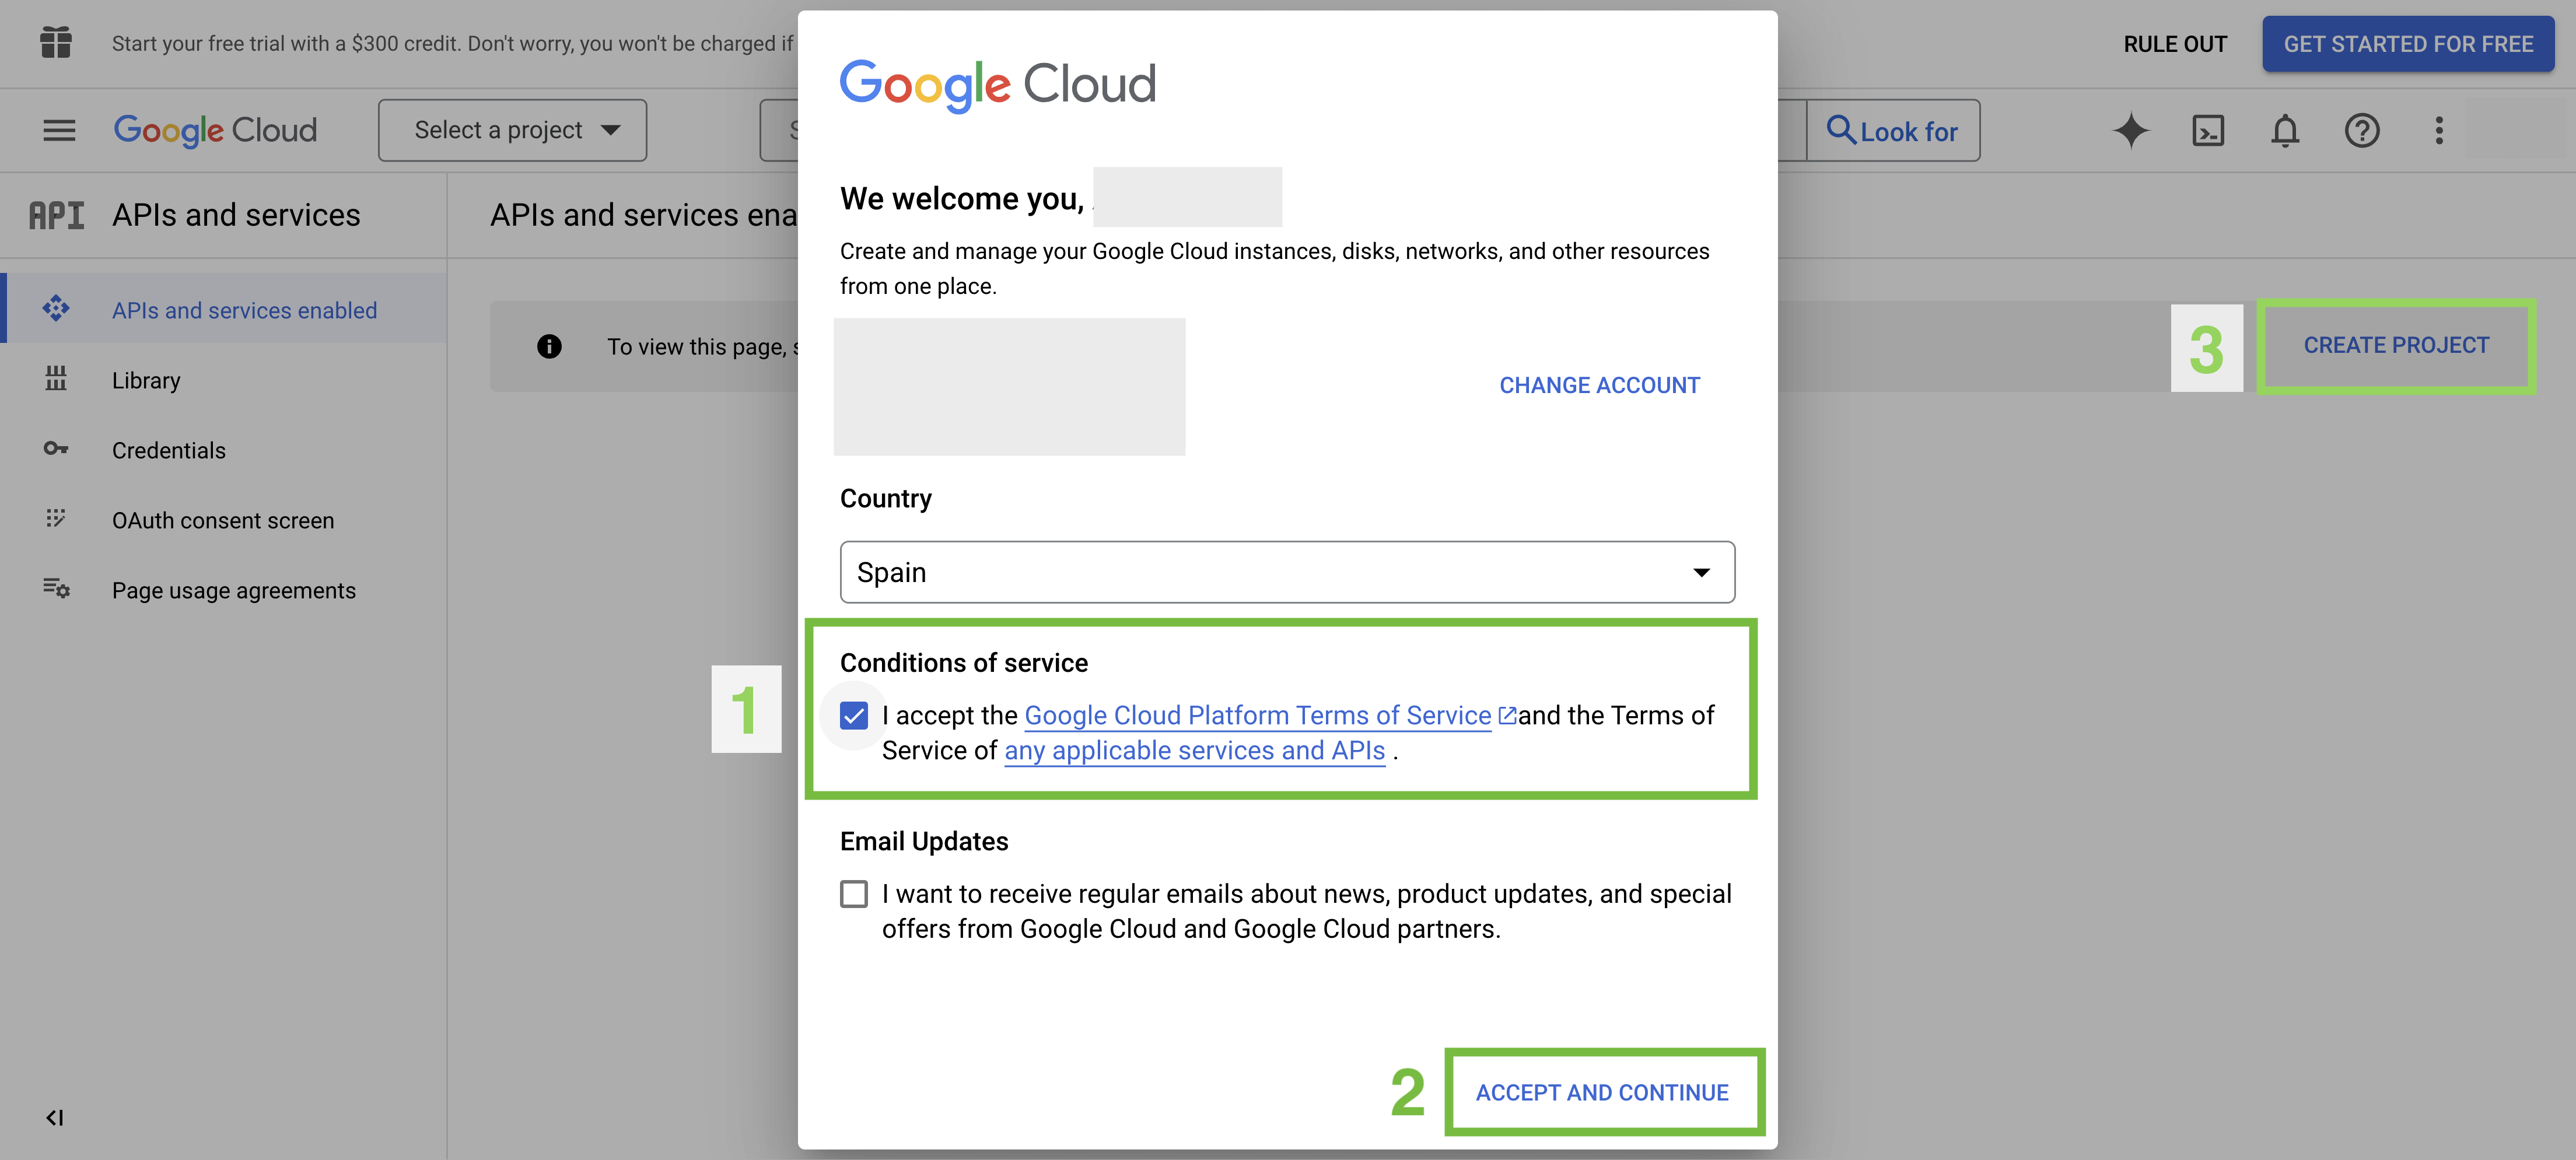
- [1] Accept the conditions of service.
- [2] Click ACCEPT AND CONTINUE.
- [3] Click CREATE PROJECT.
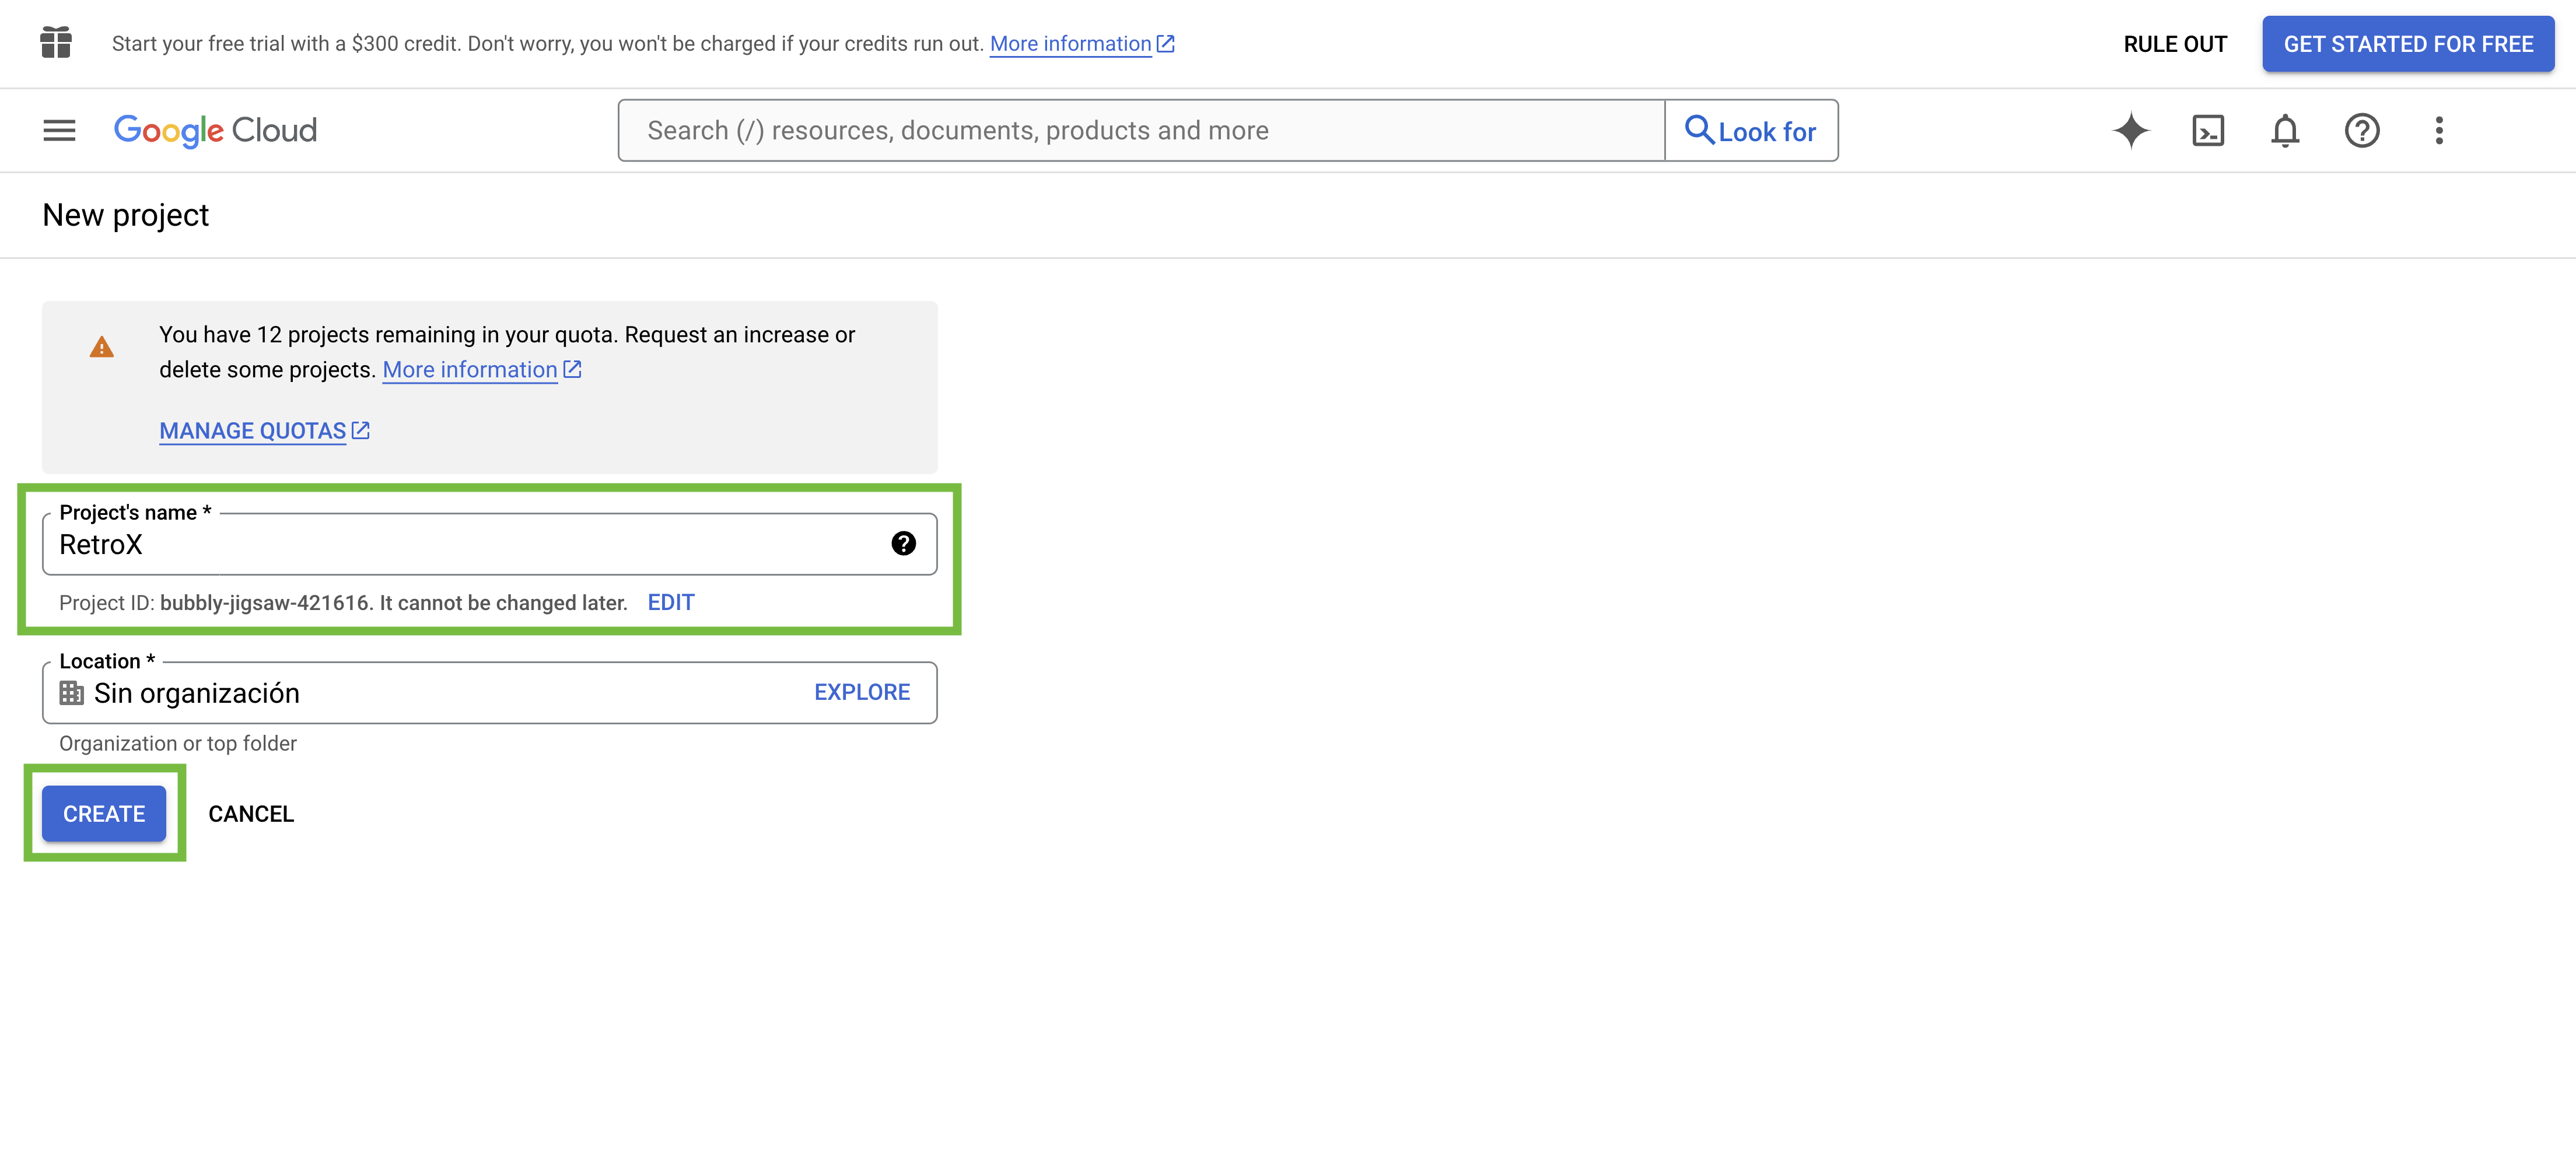
- Type RetroX as a project's name.
- Click CREATE.
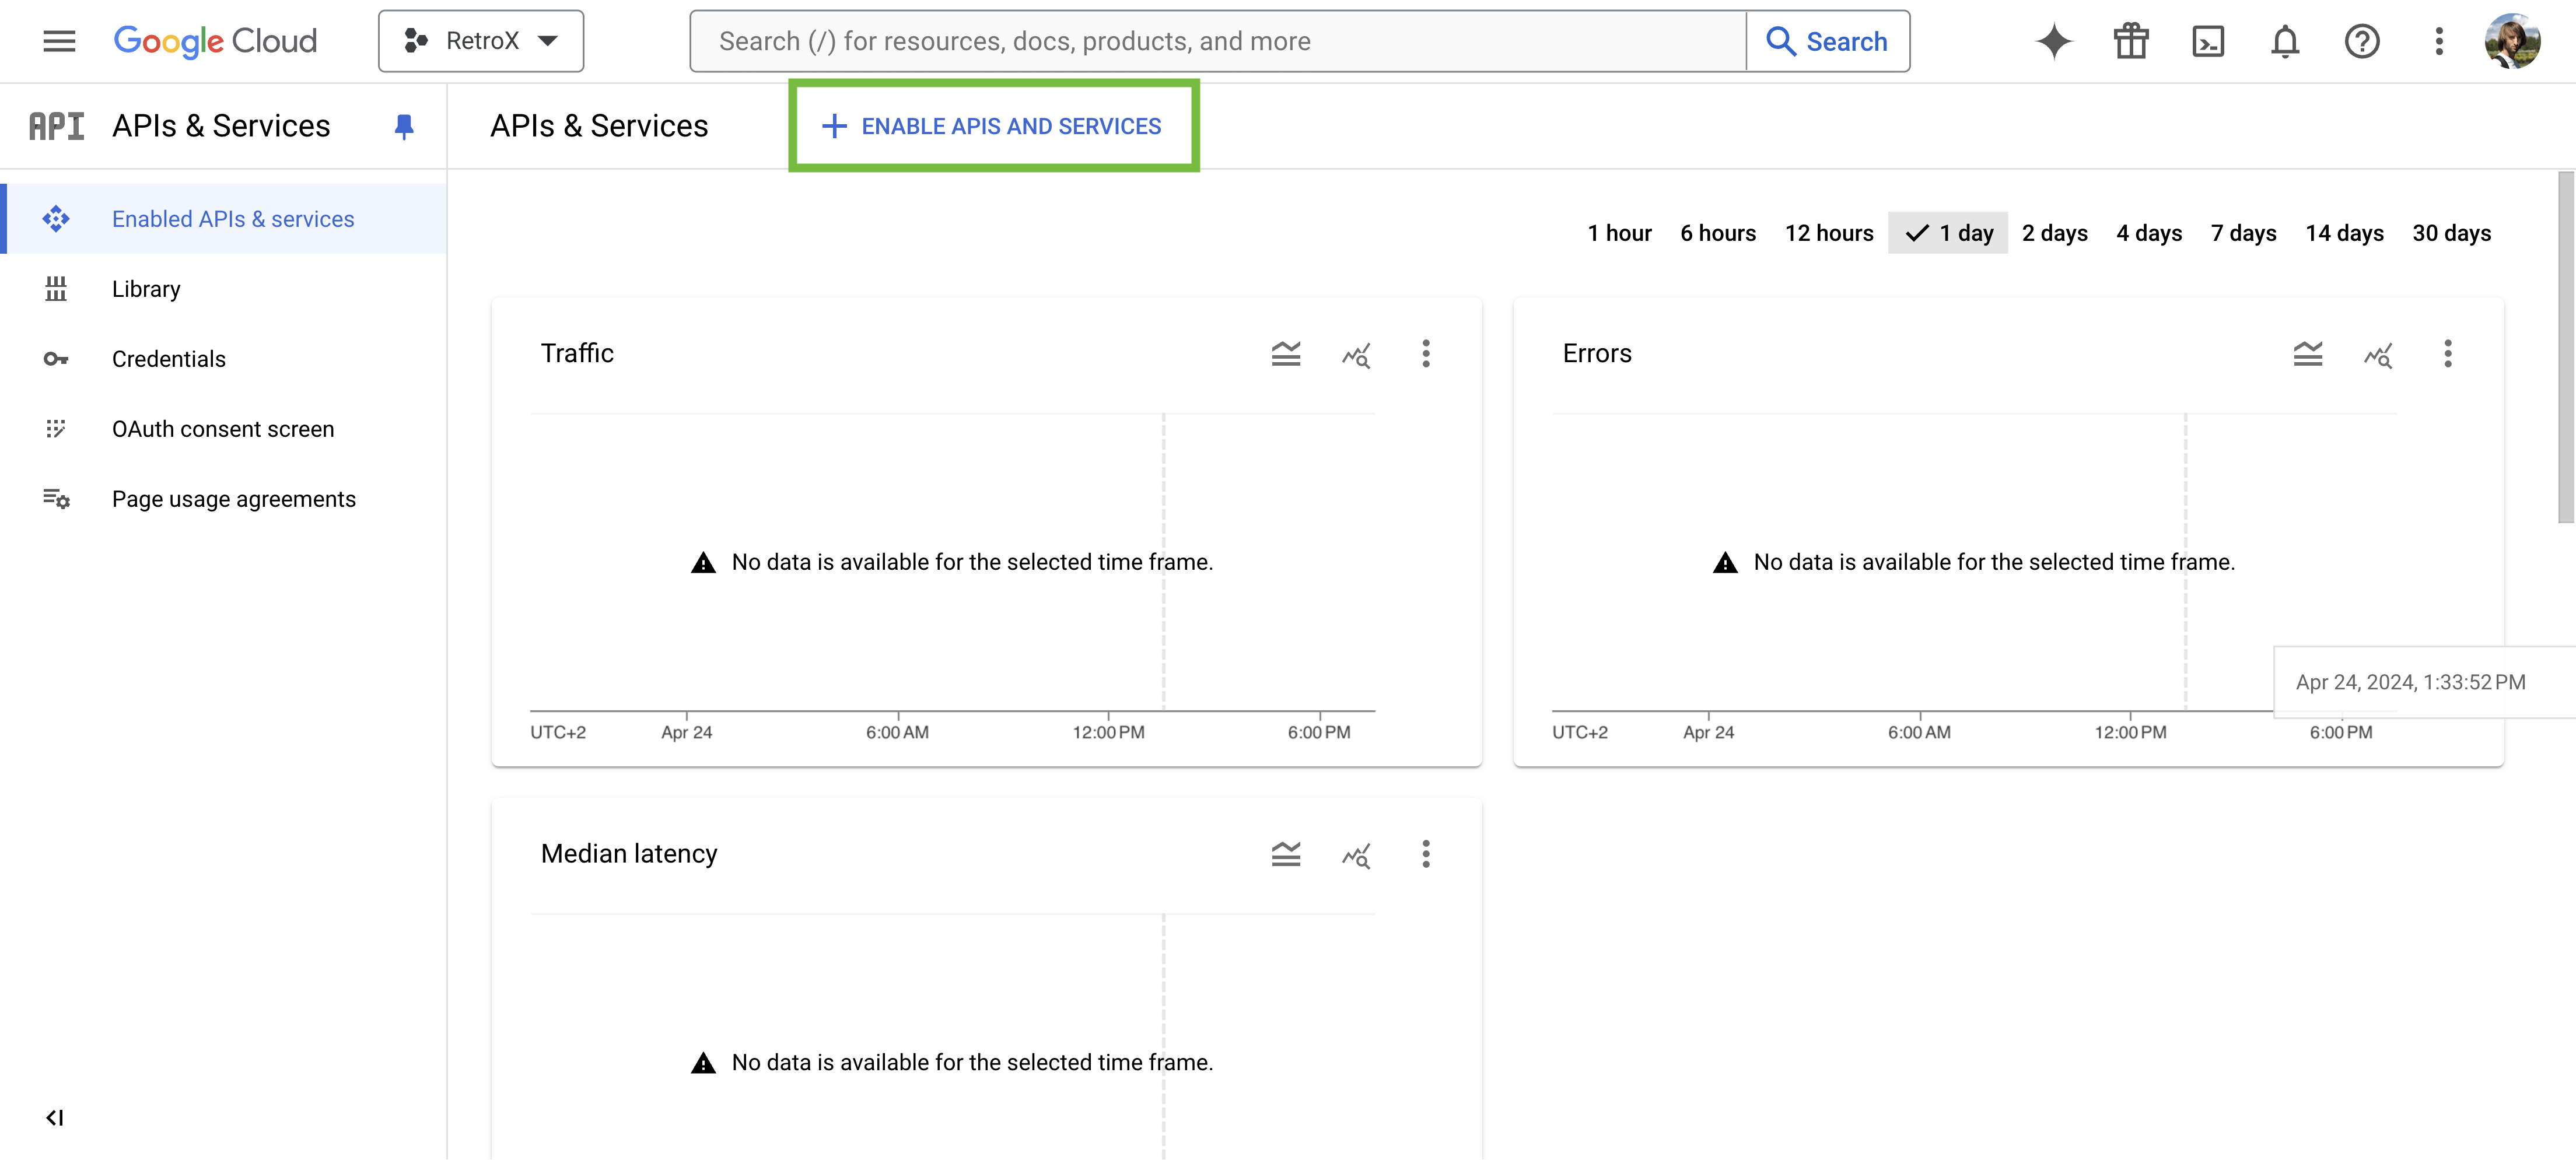
Click + ENABLE APIS AND SERVICES.
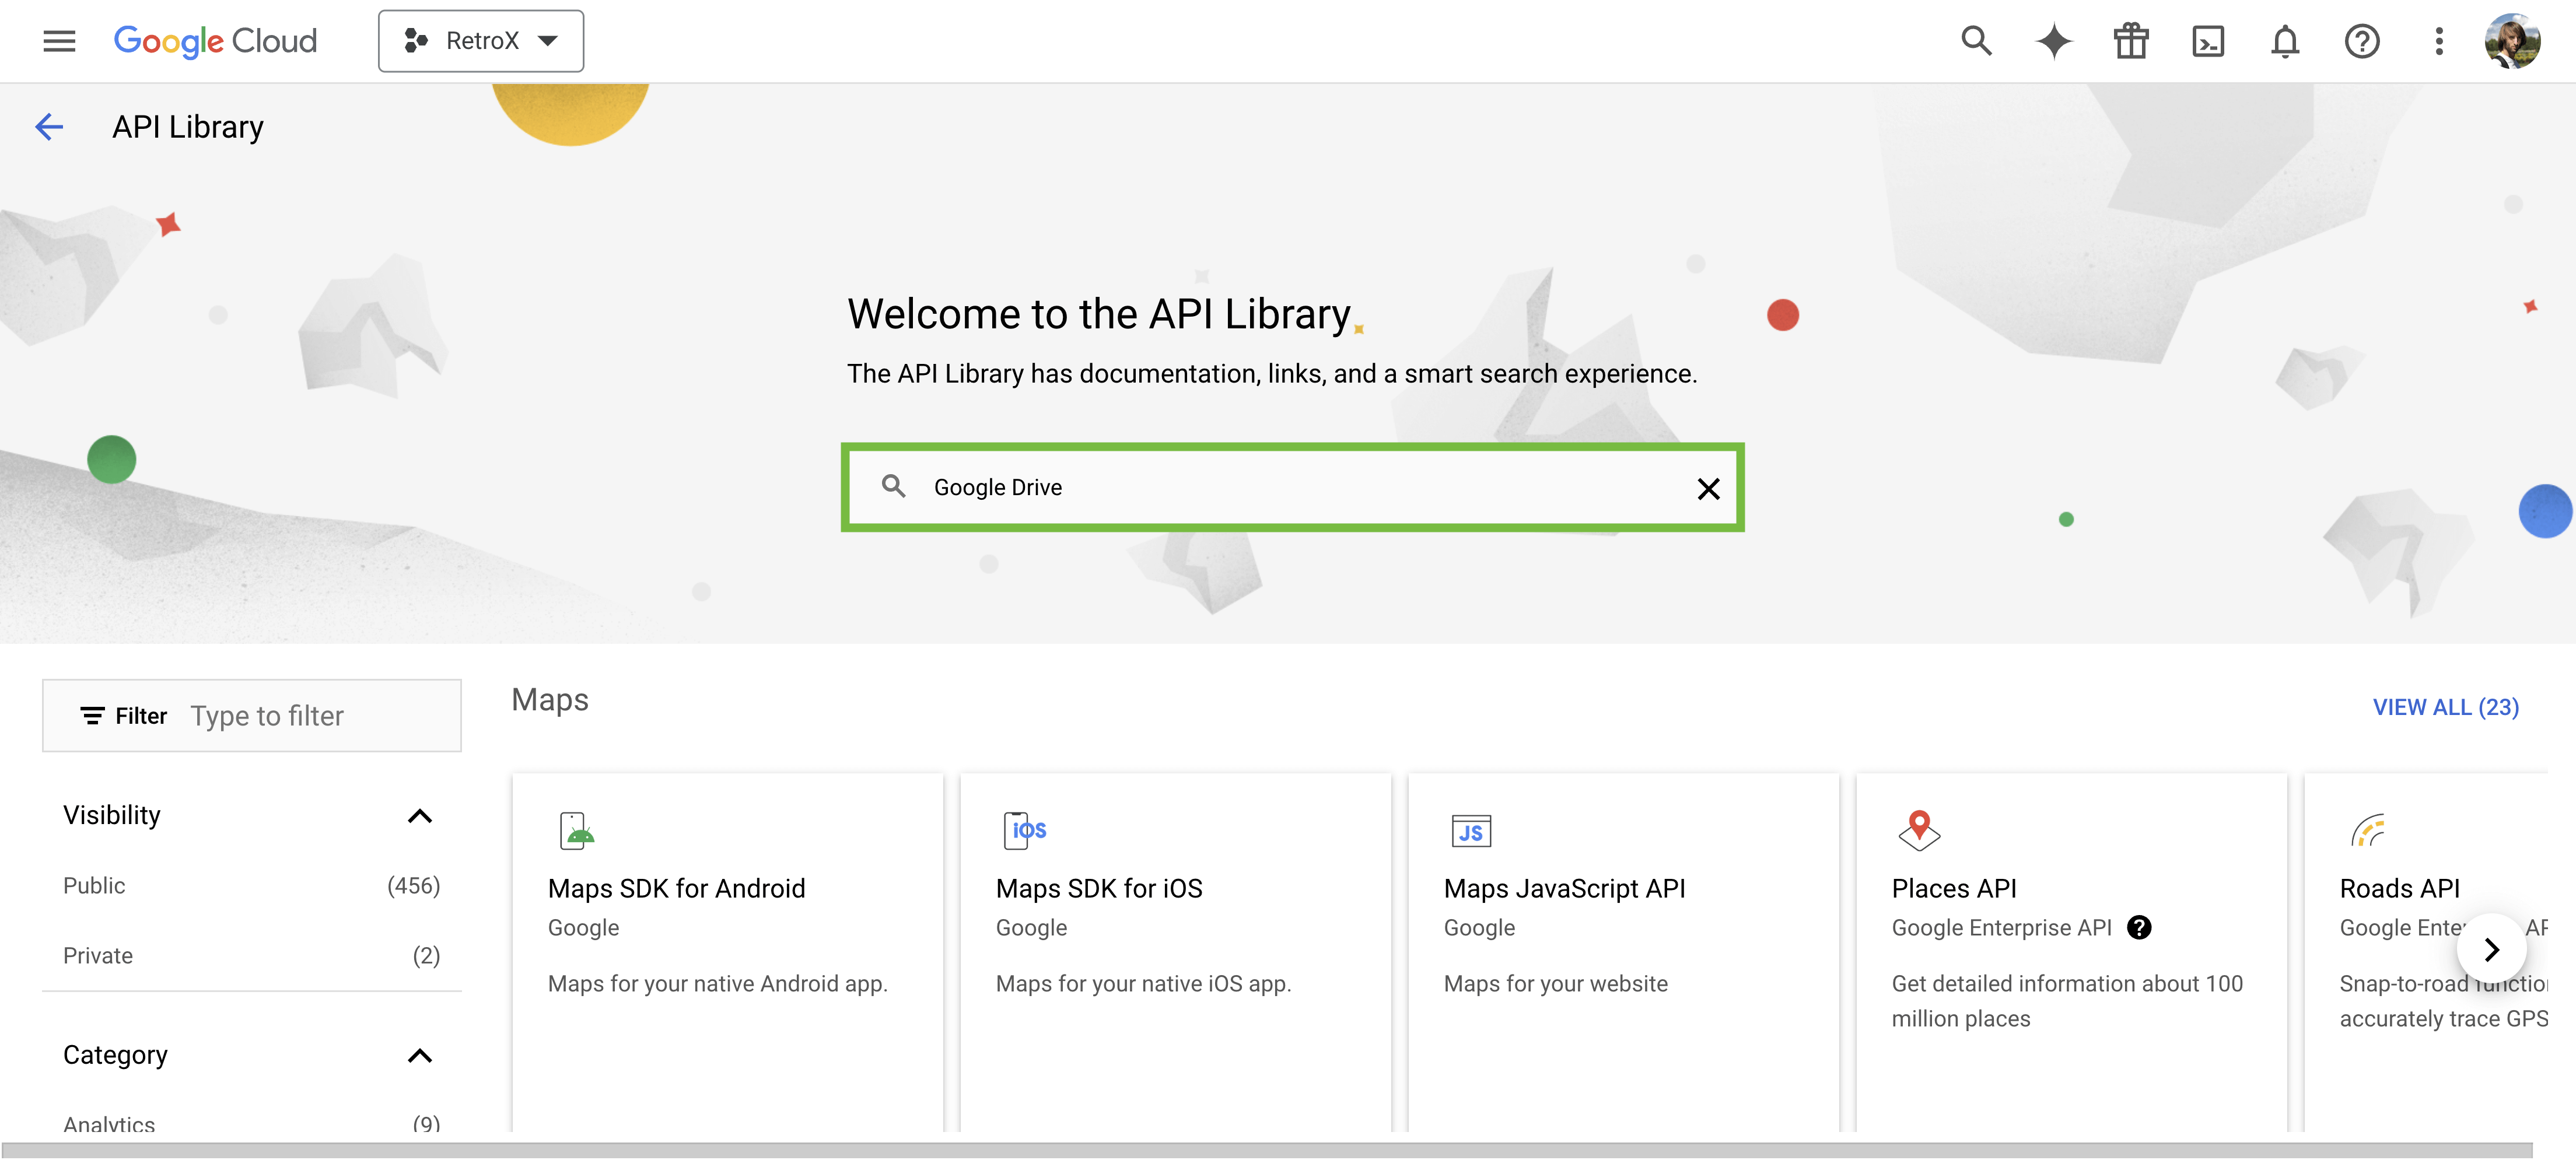
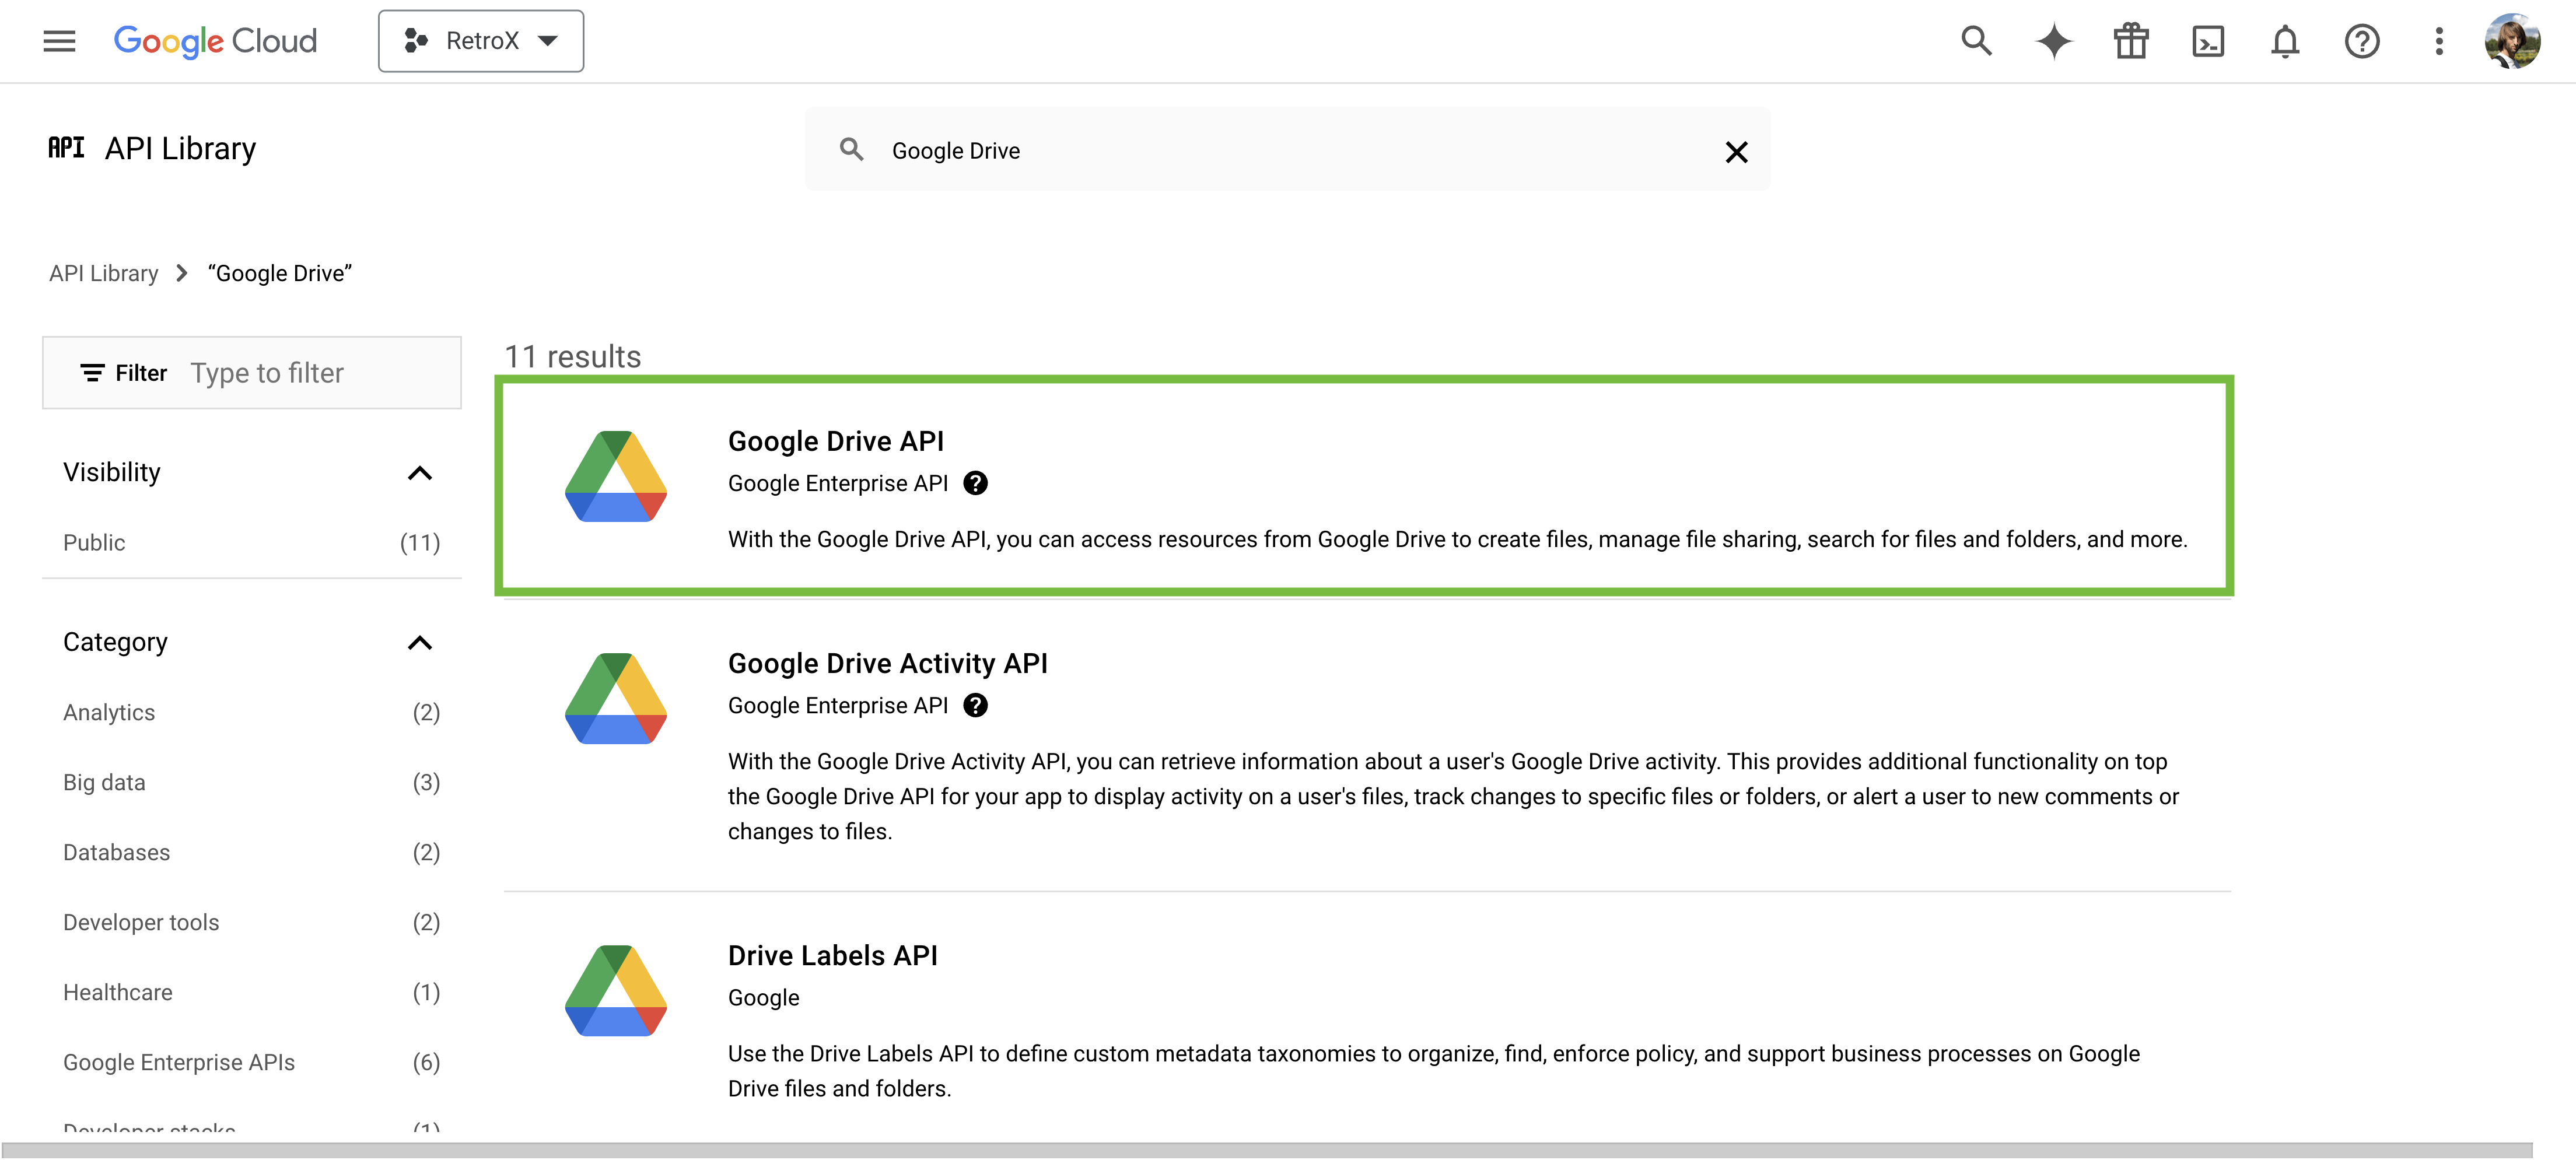
Search the API Google Drive and press enter.
Select the Google Drive API on the list.
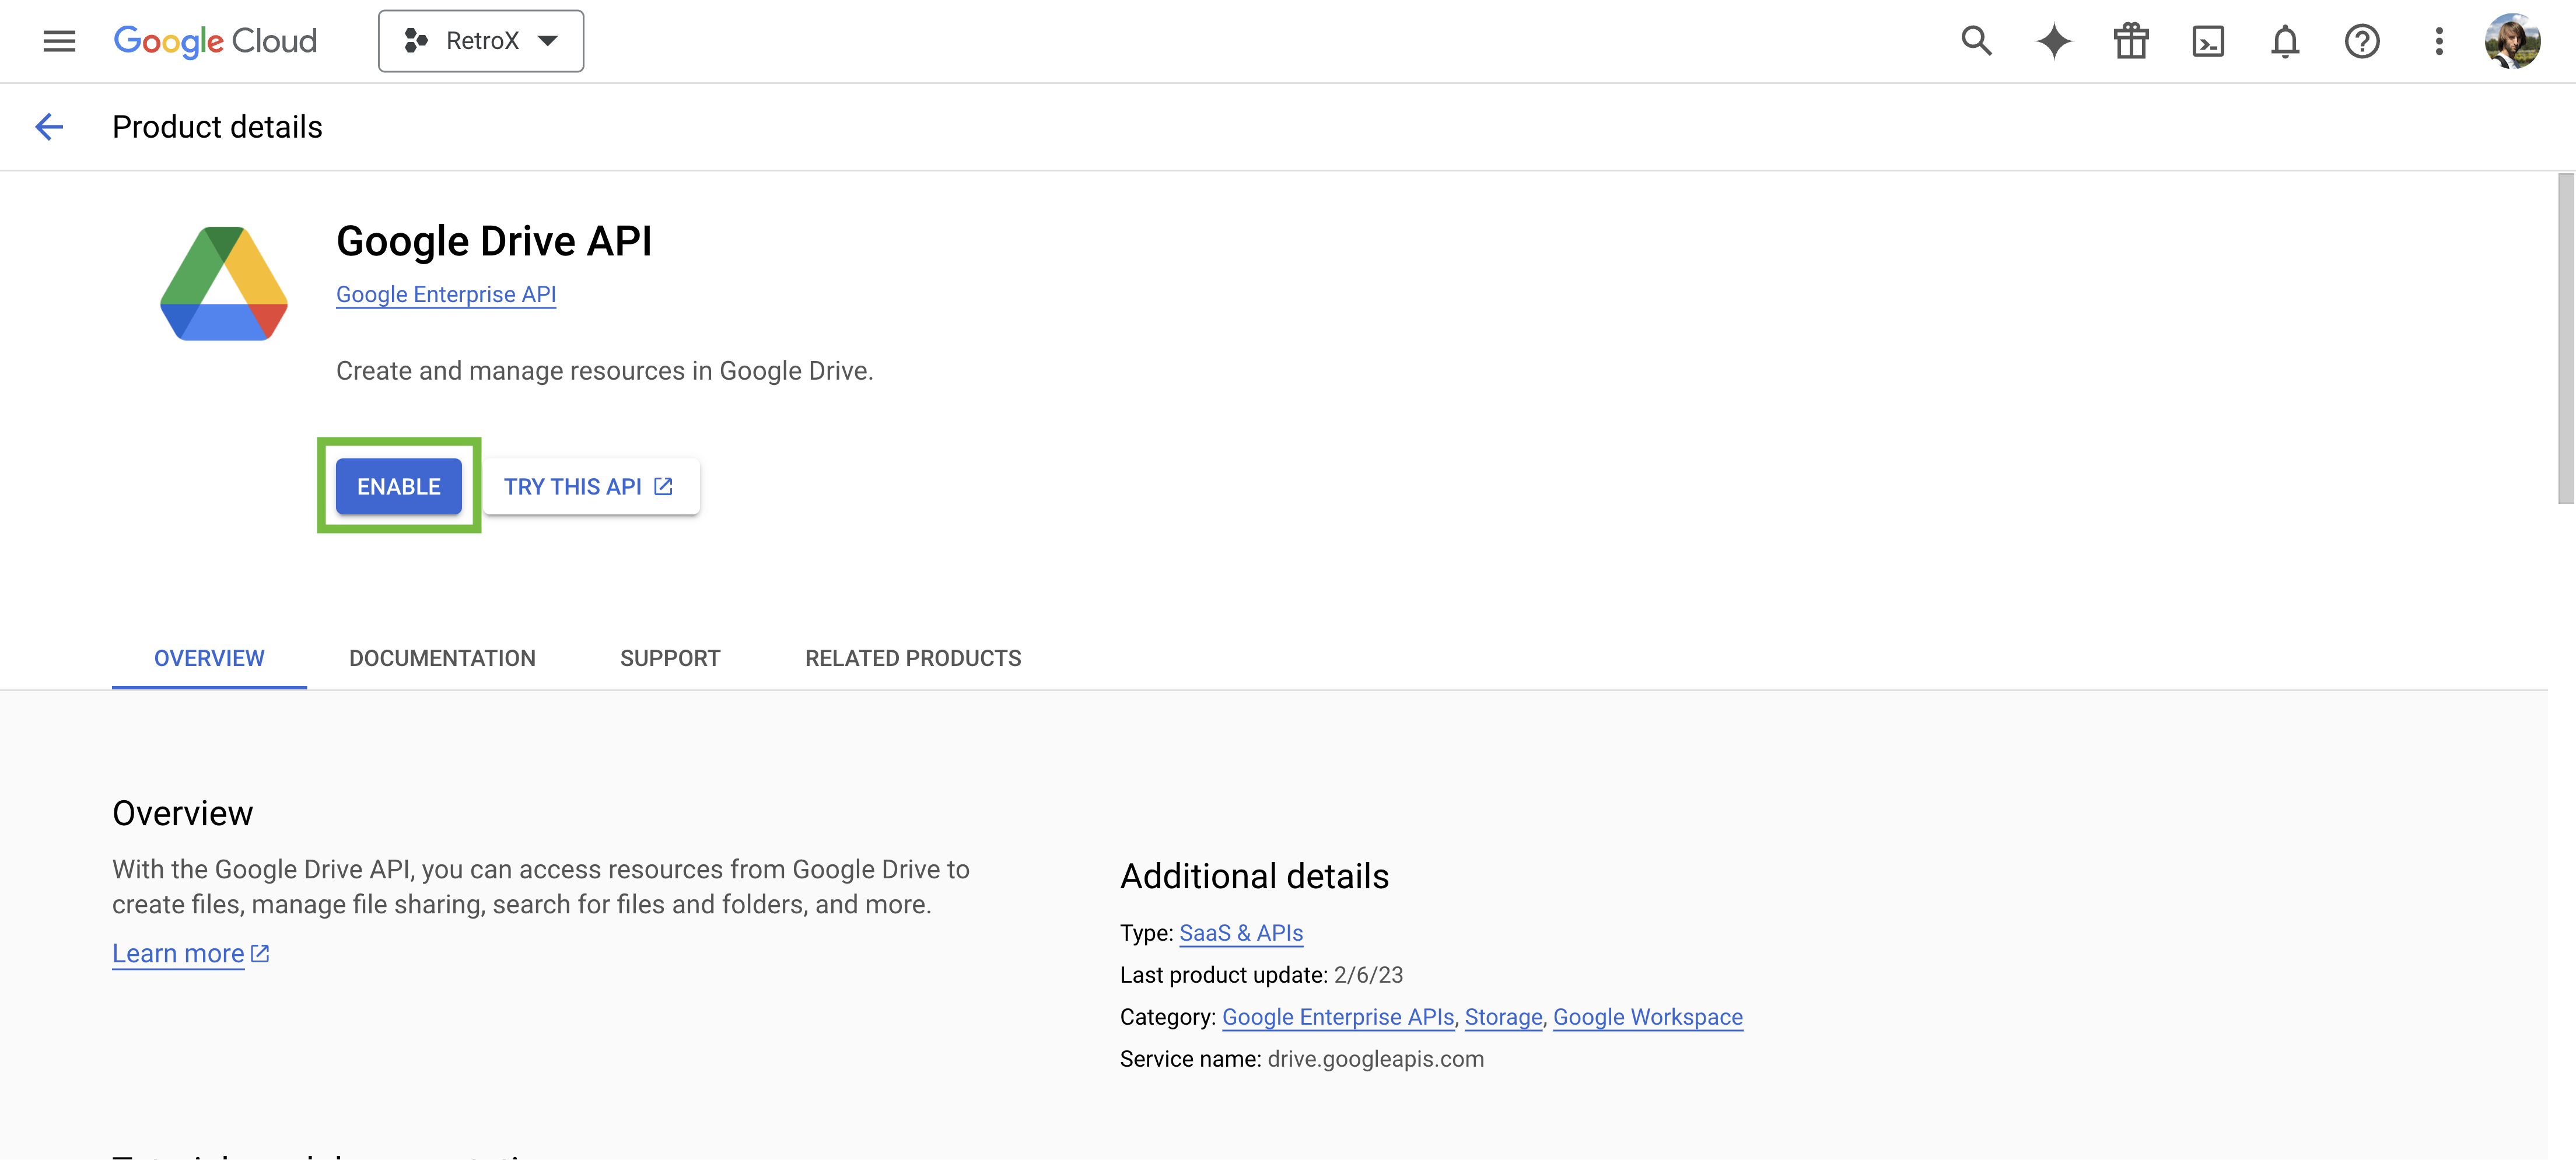
Click the ENABLE button.
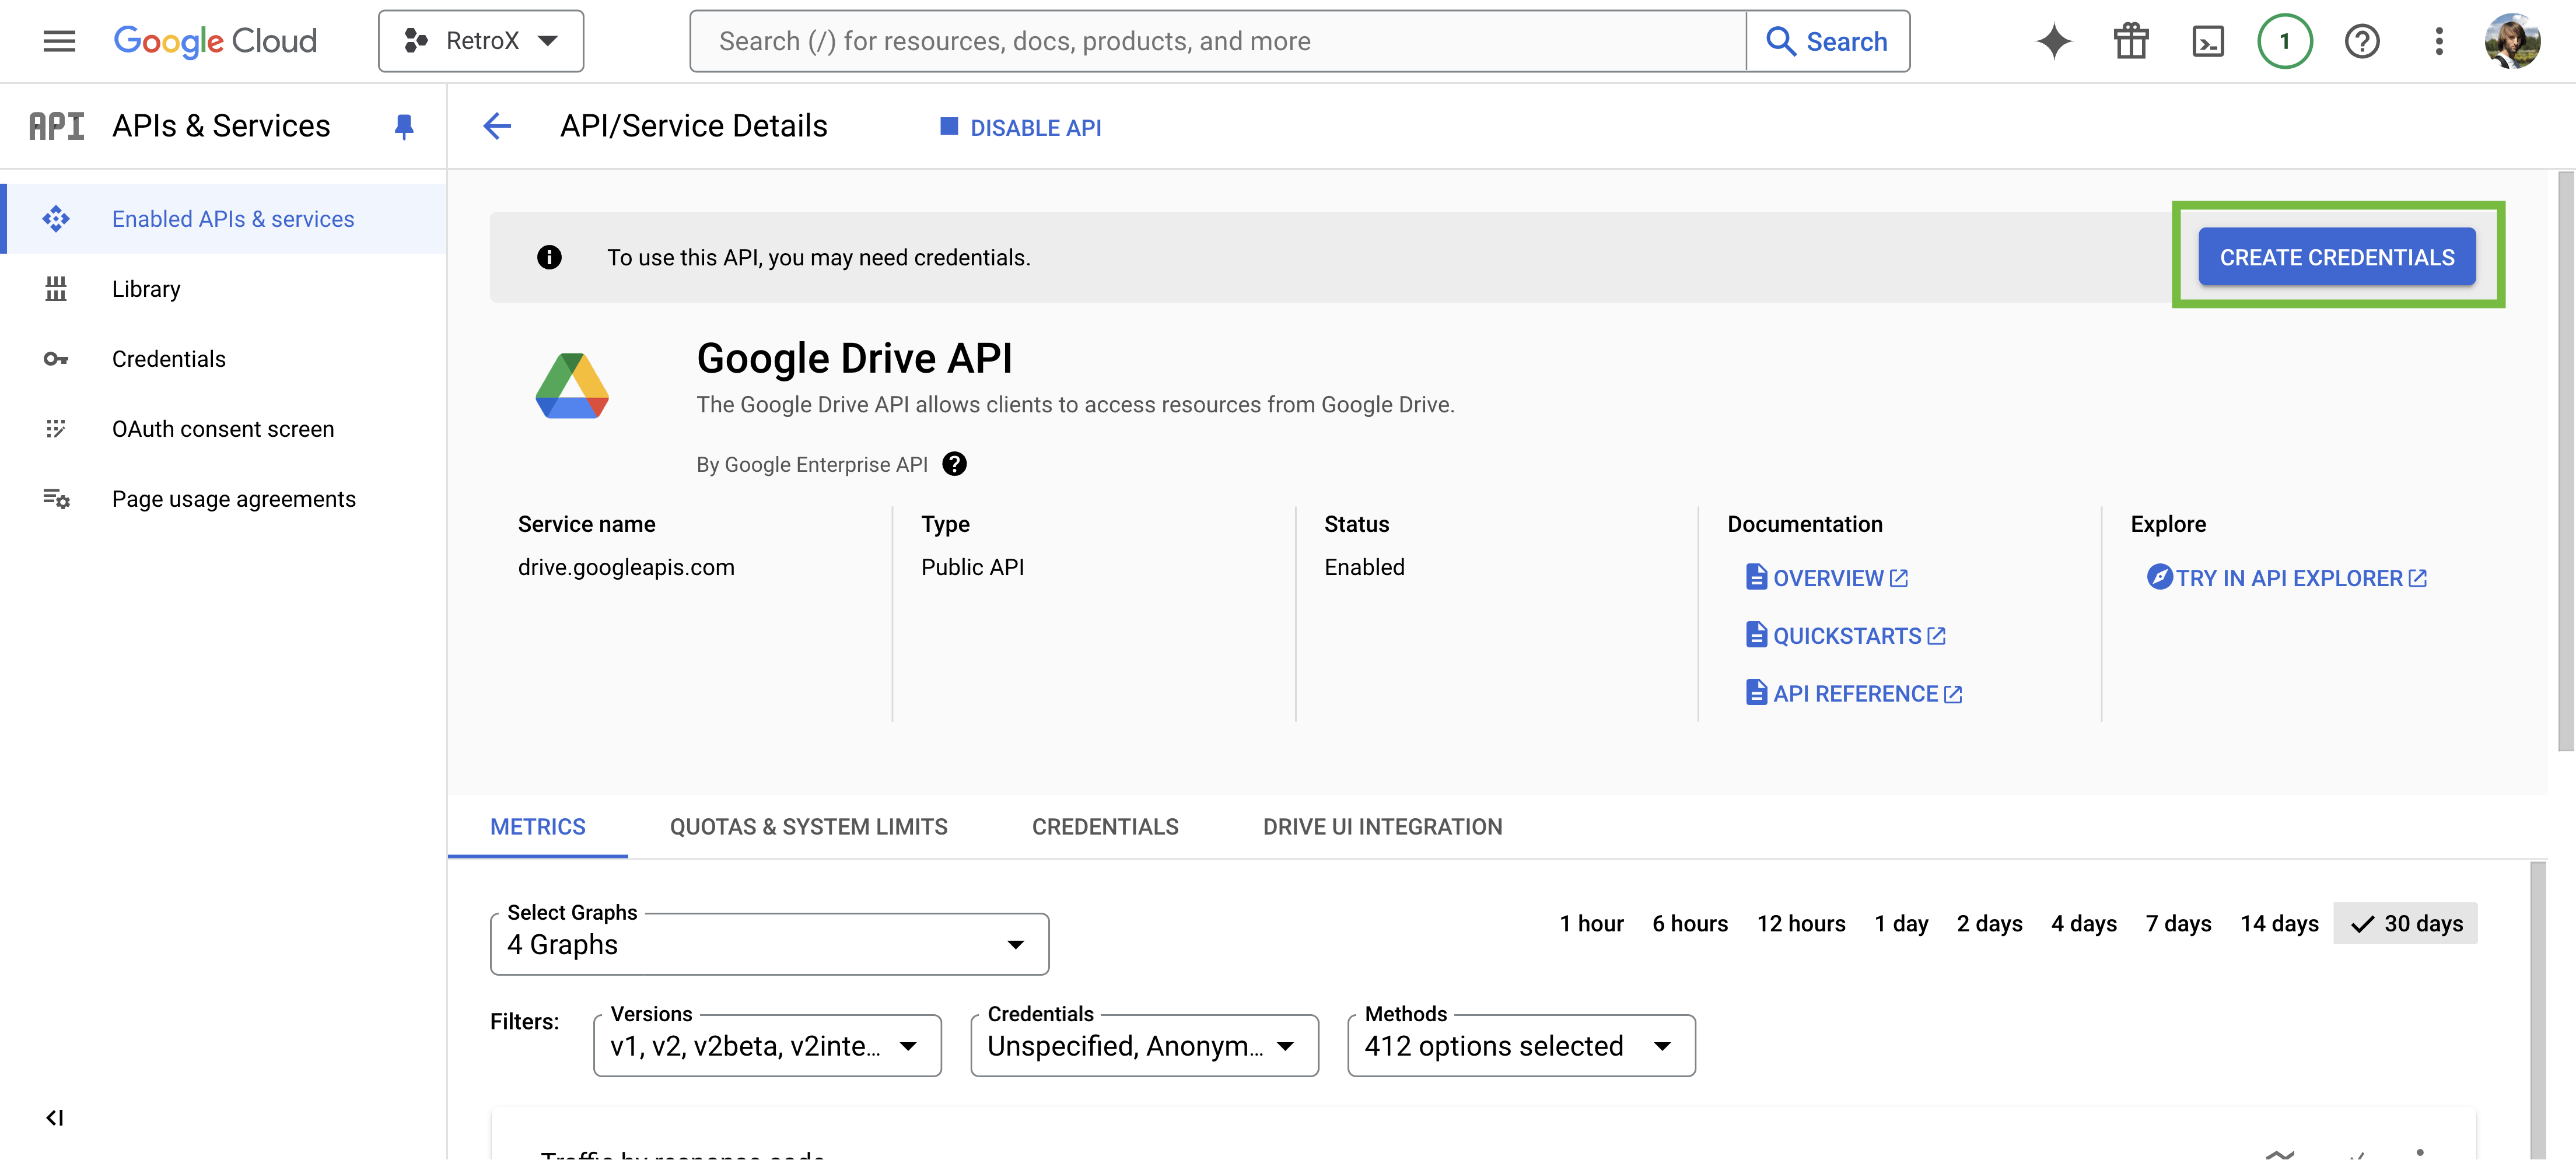
Click the CREATE CREDENTIALS button.
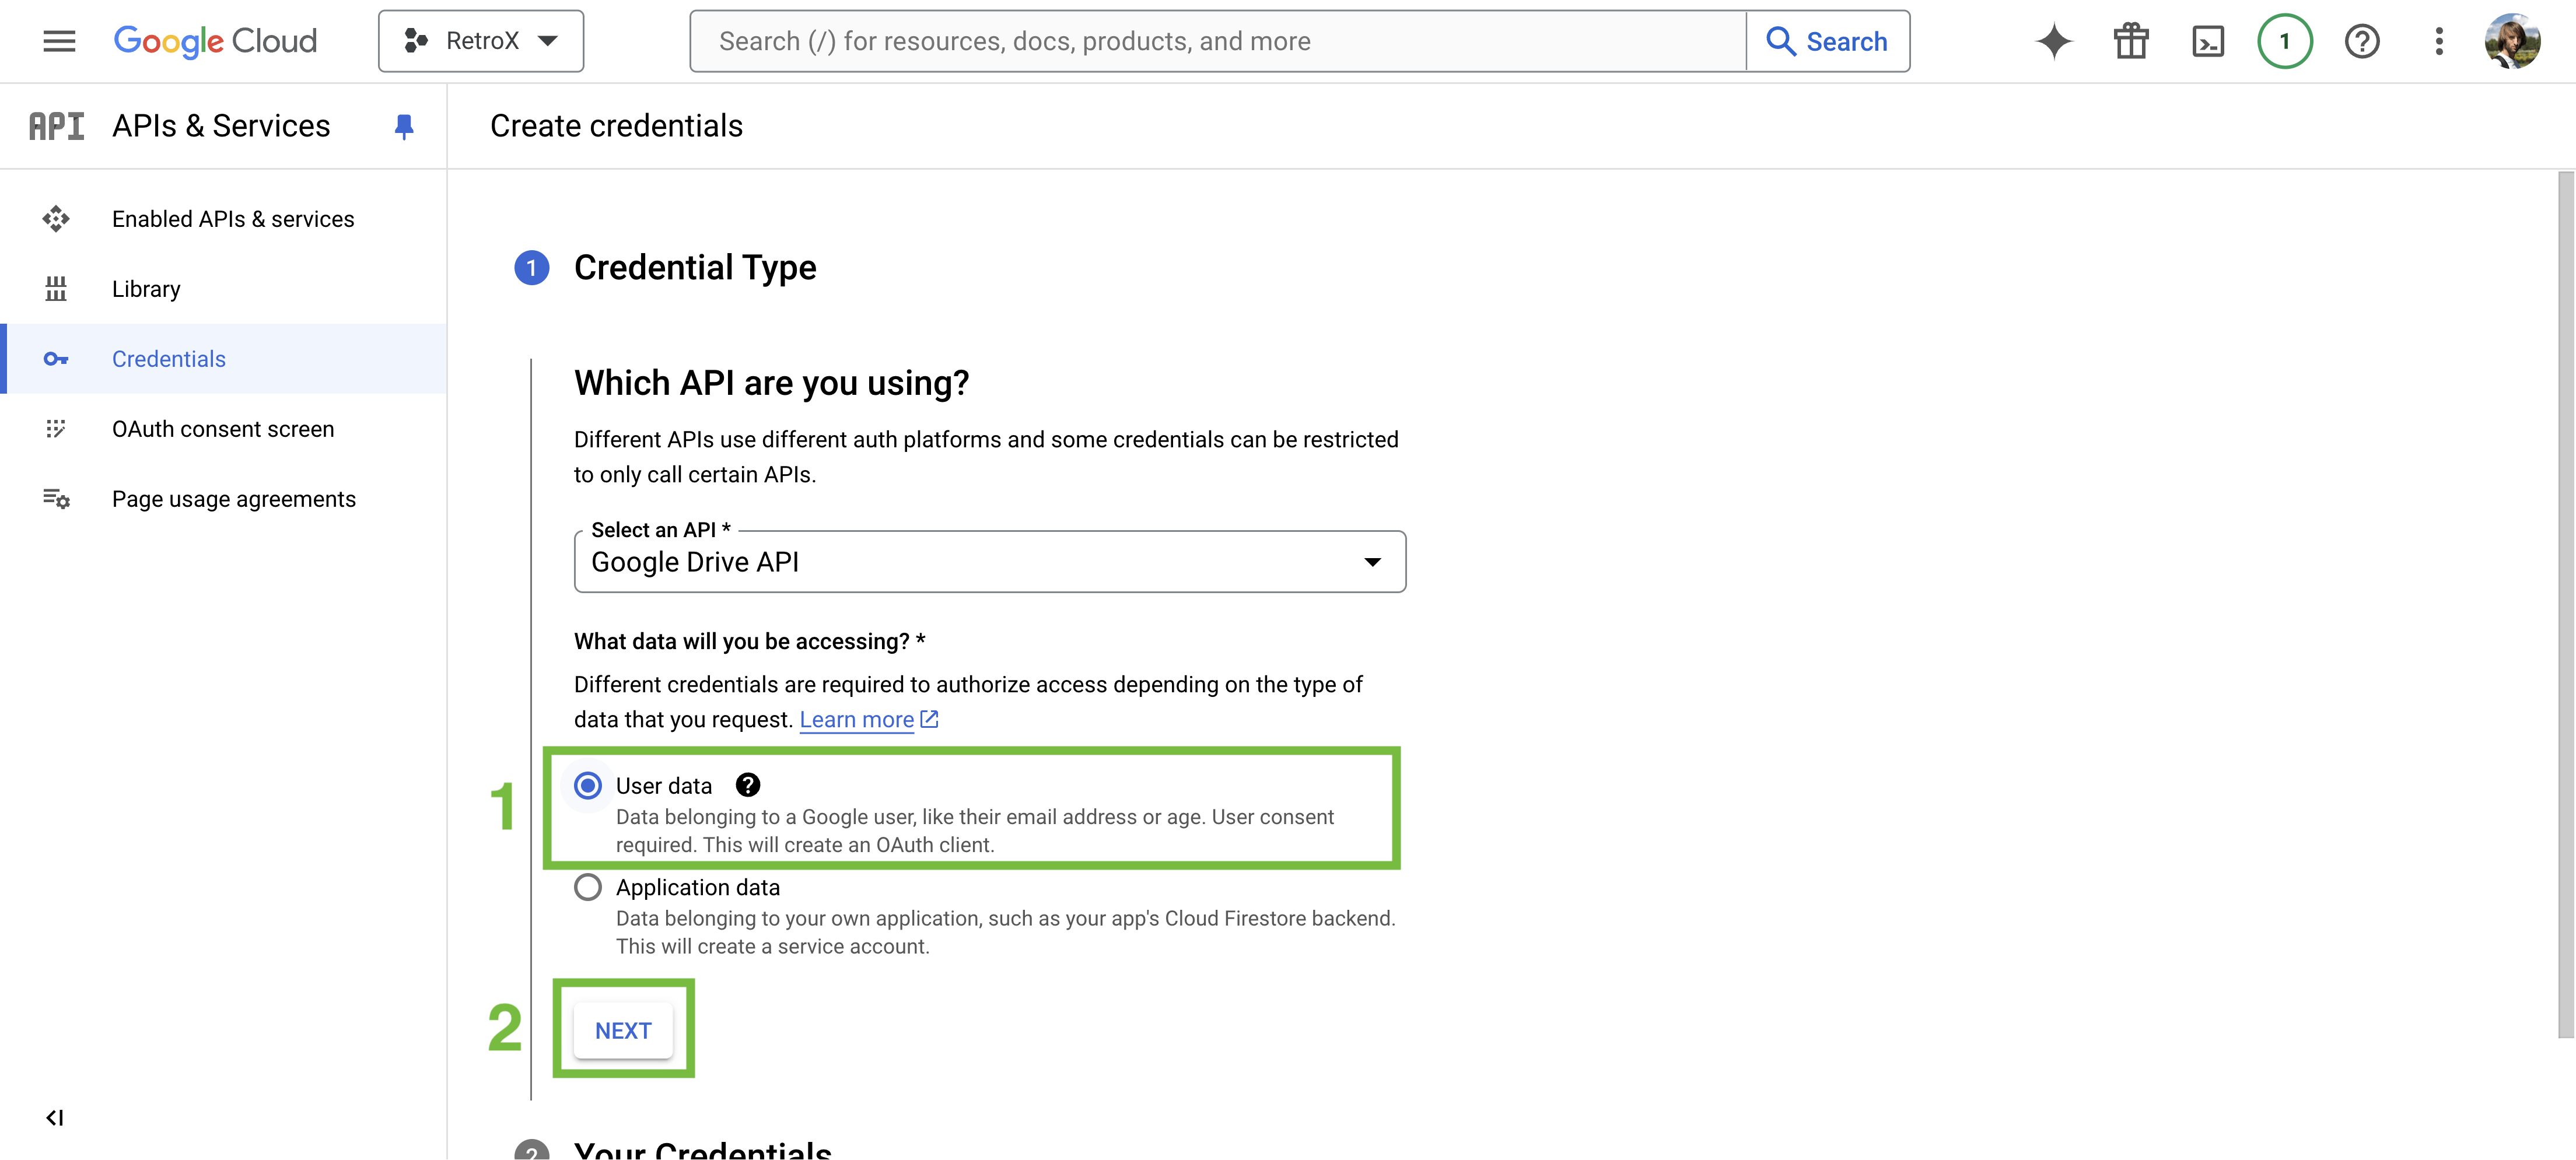
Select User data and then click the NEXT button.
- [1] Type RetroX as the name.
- [2] Select your Gmail email.
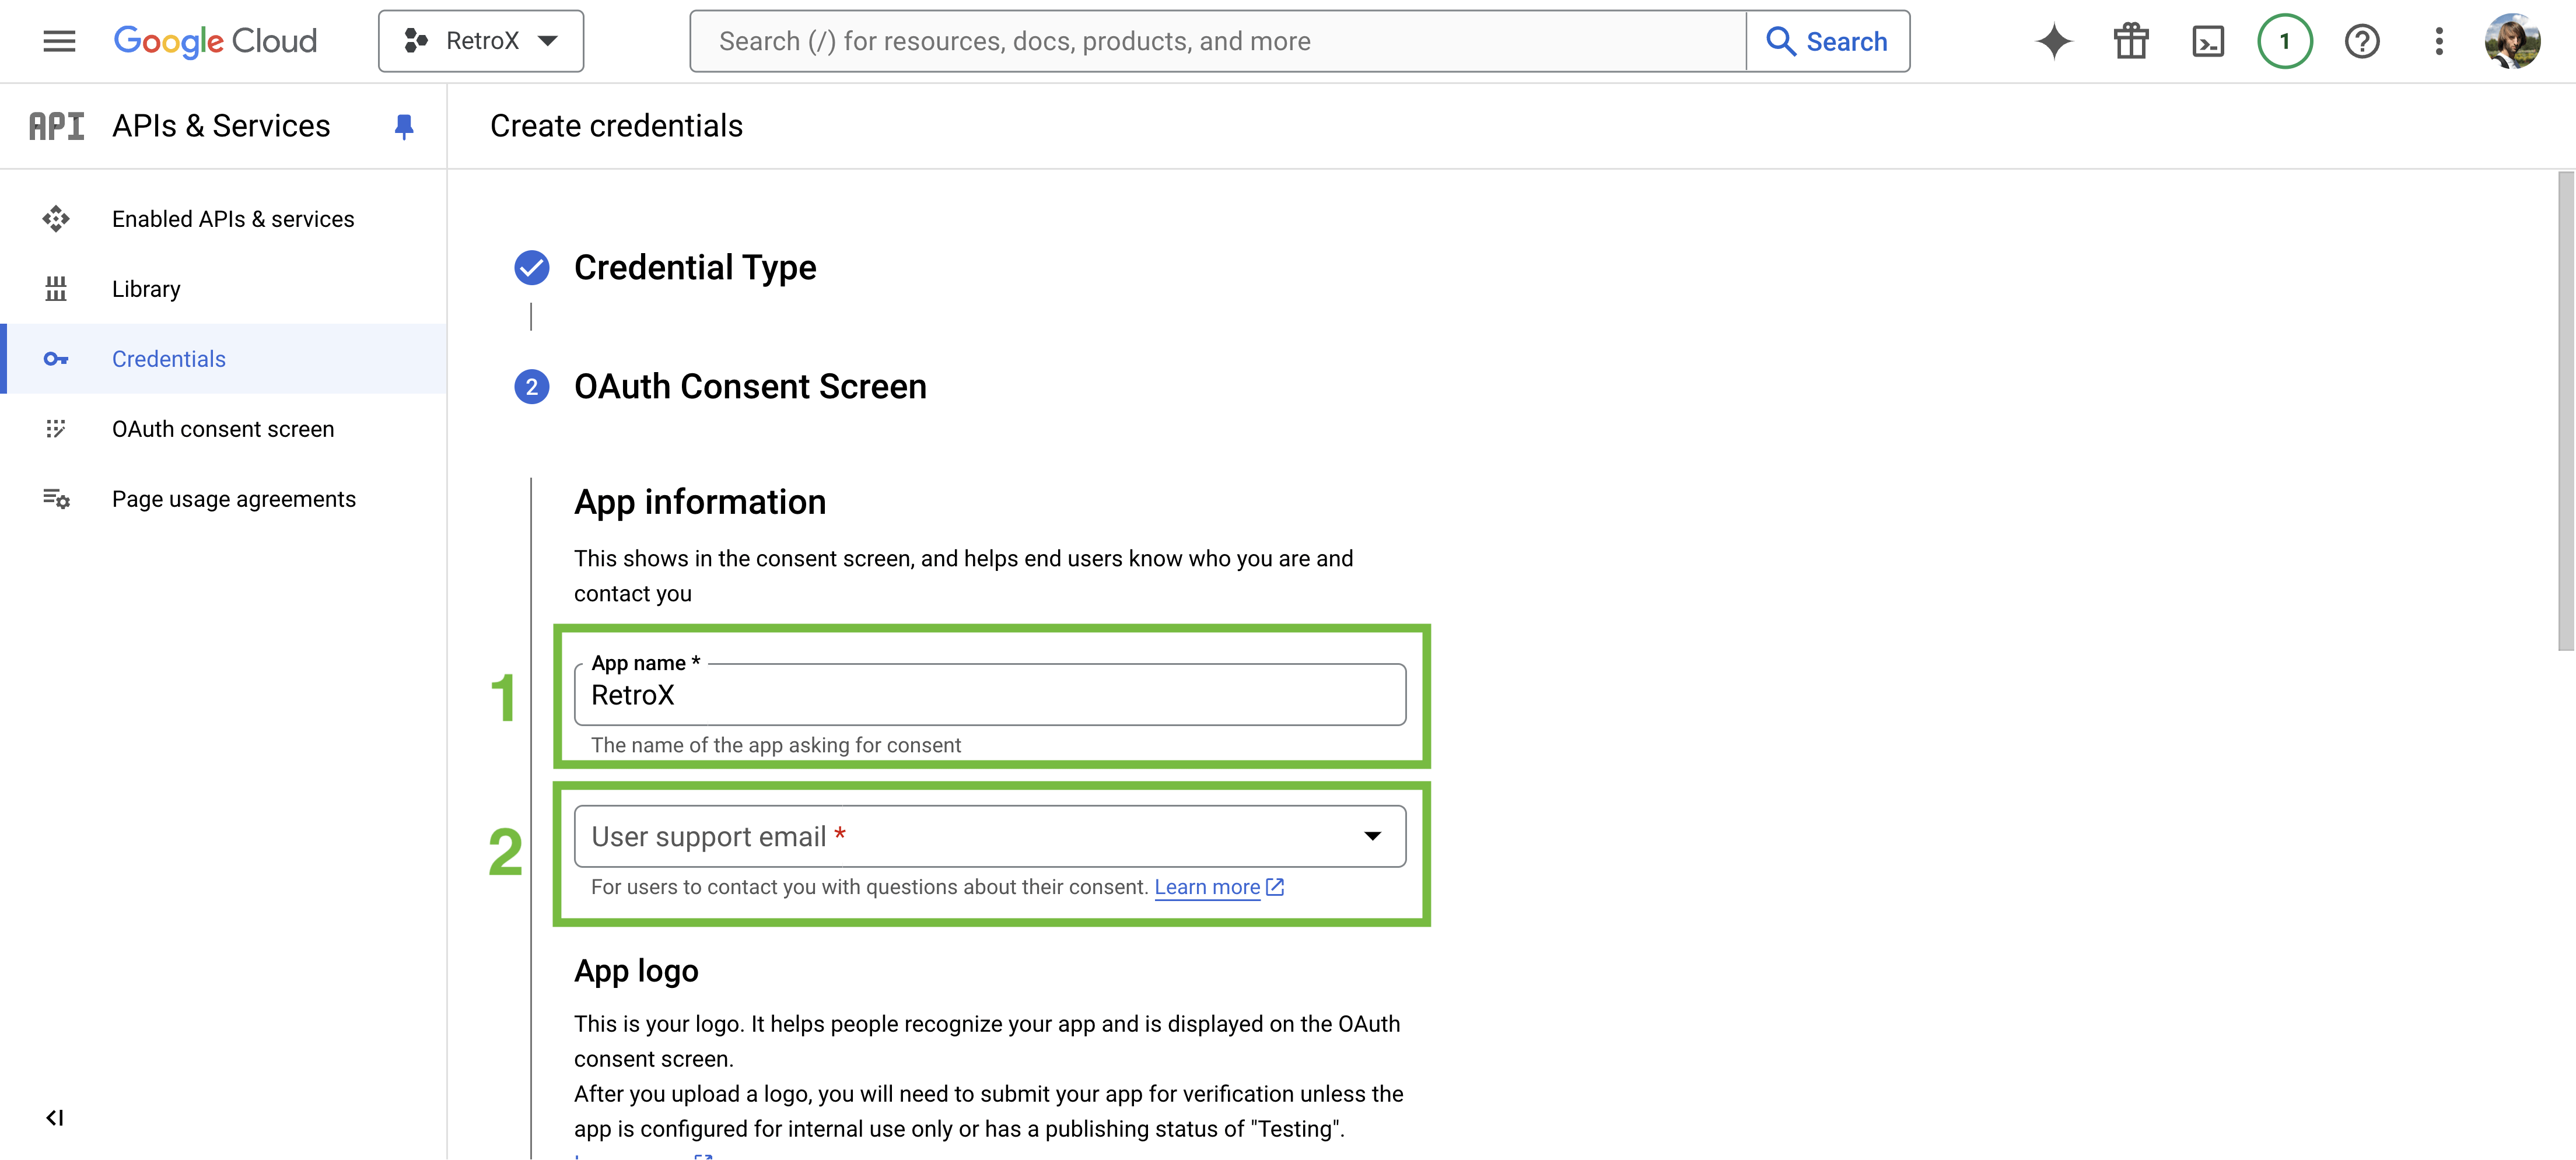
- [1] Enter your Gmail email.
- [2] Click SAVE AND CONTINUE.

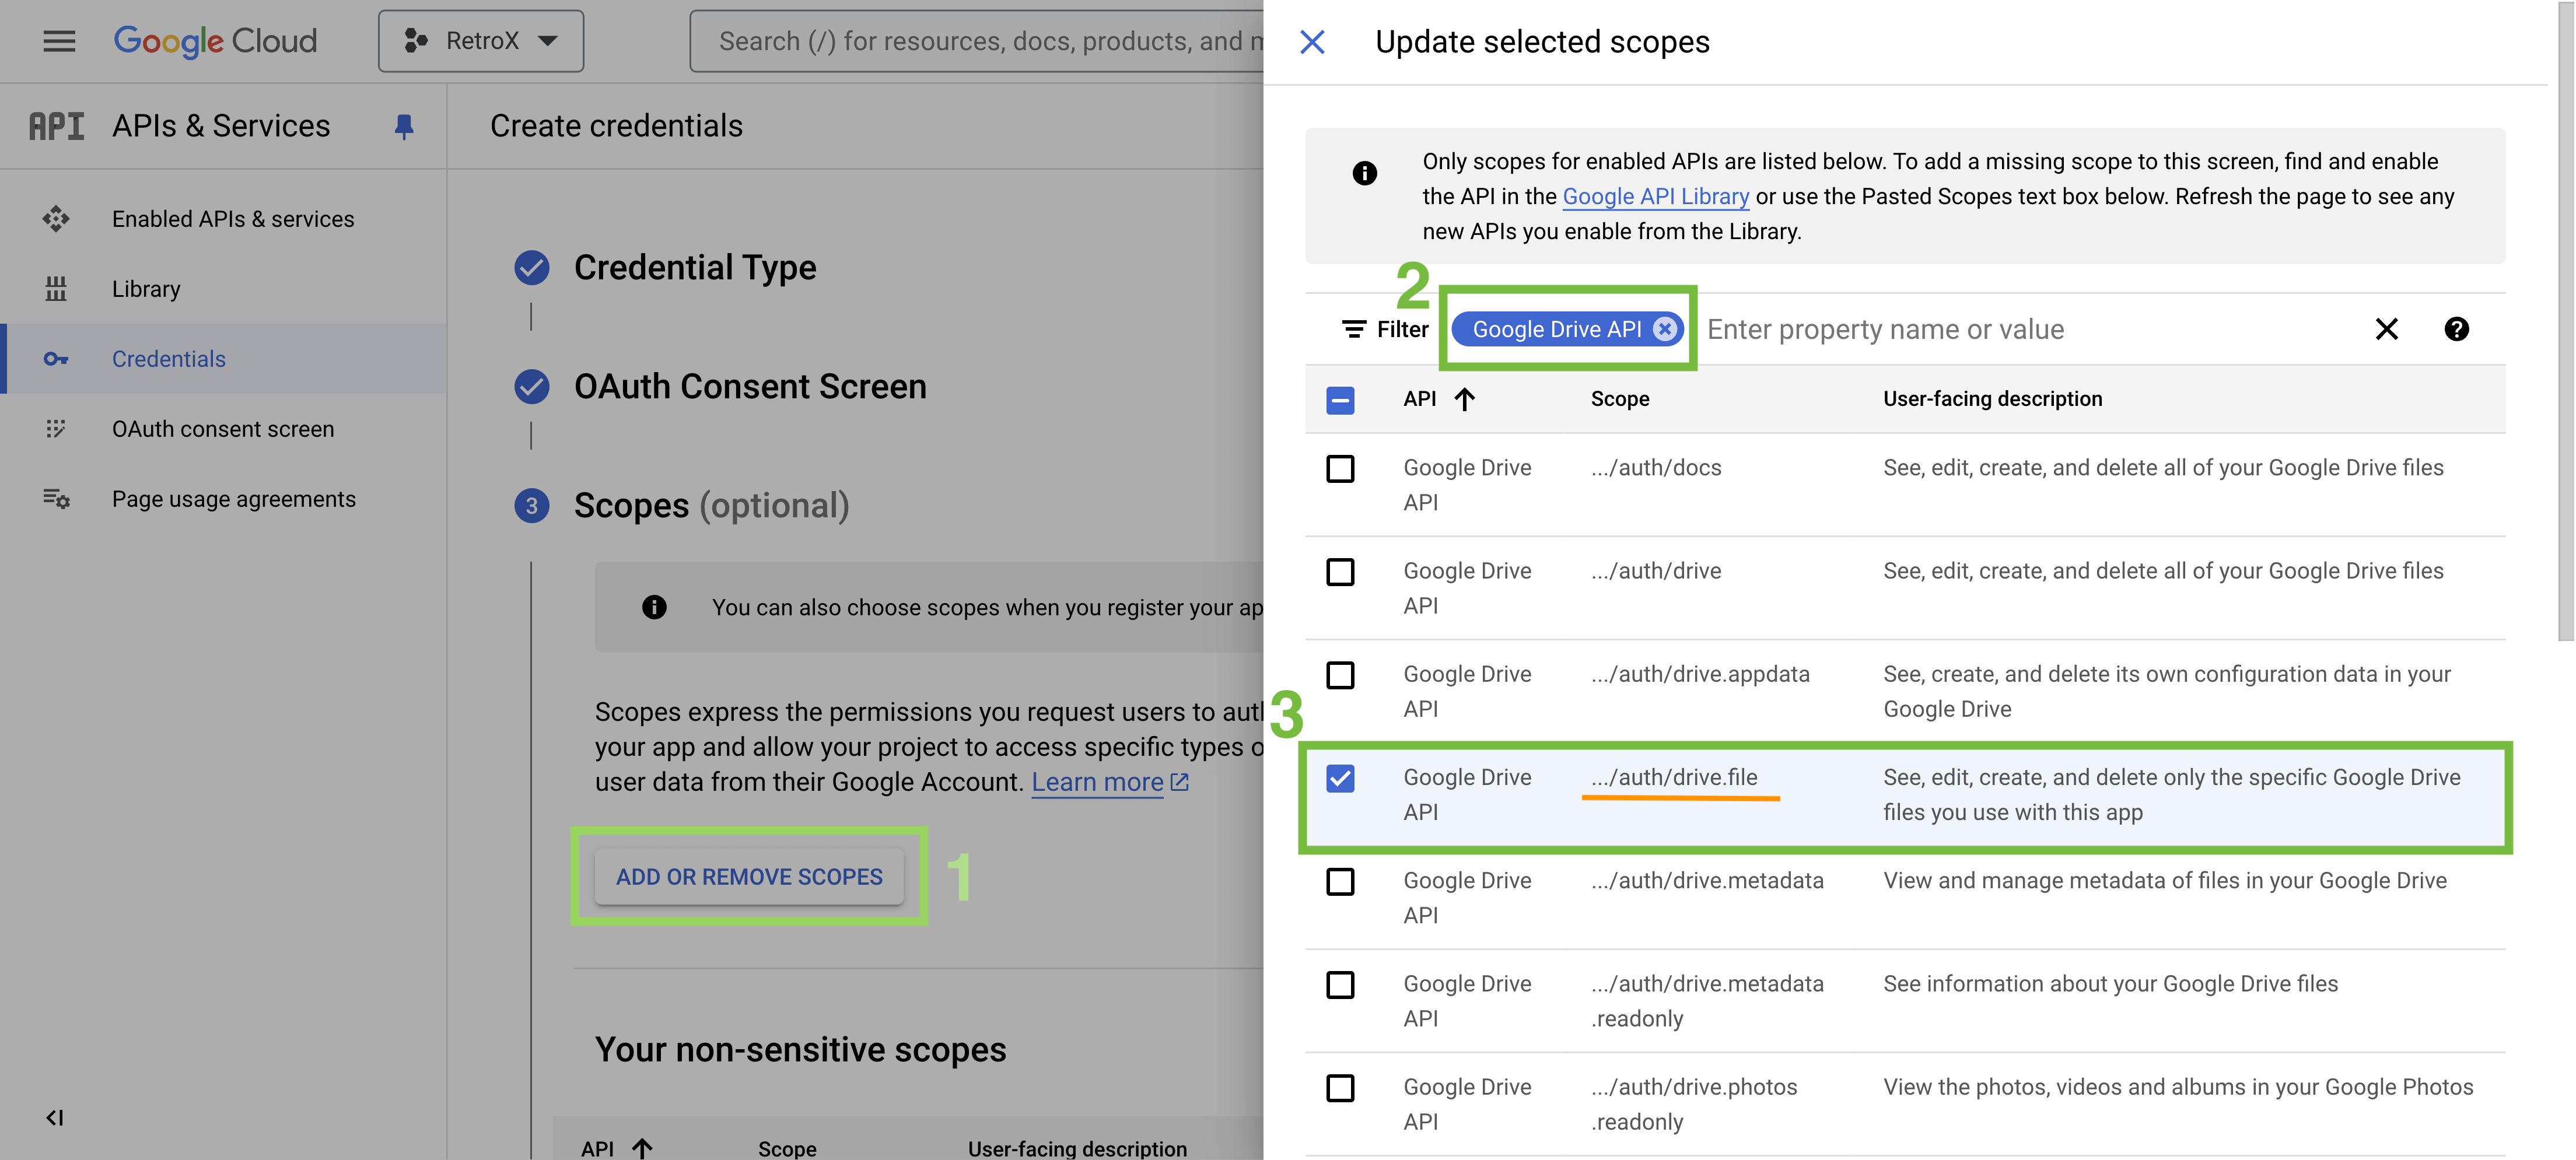
- [1] Click ADD OR REMOVE SCOPES.
- [2] Search for Google Drive API.
- [3] Select ../auth/drive.file.
[4] Scroll to the bottom and click the UPDATE button.
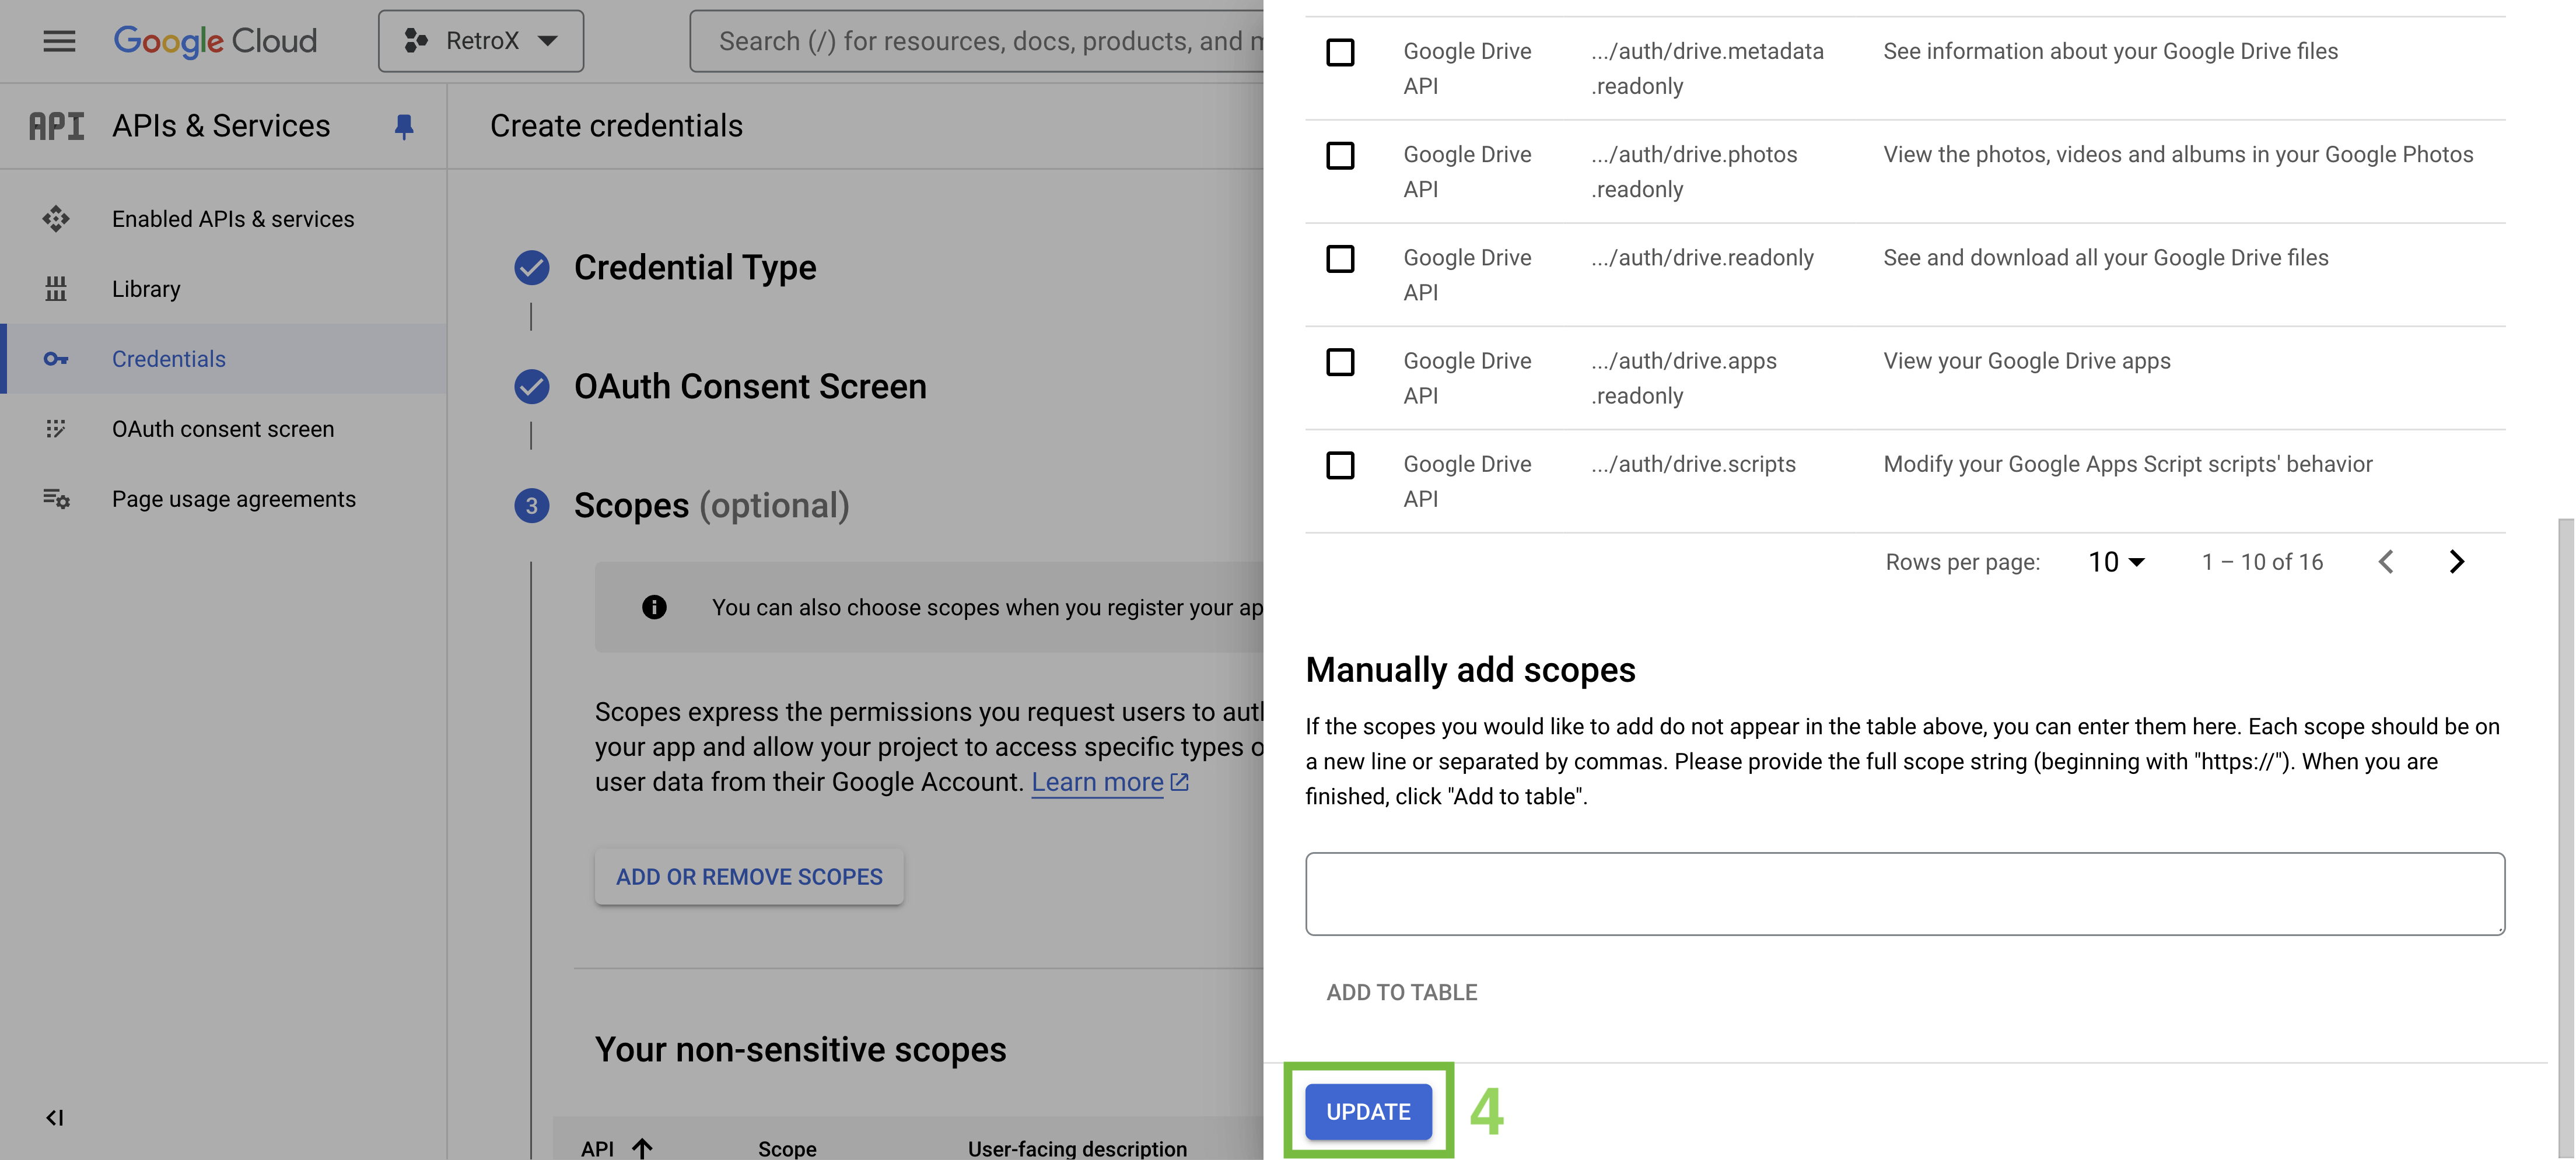
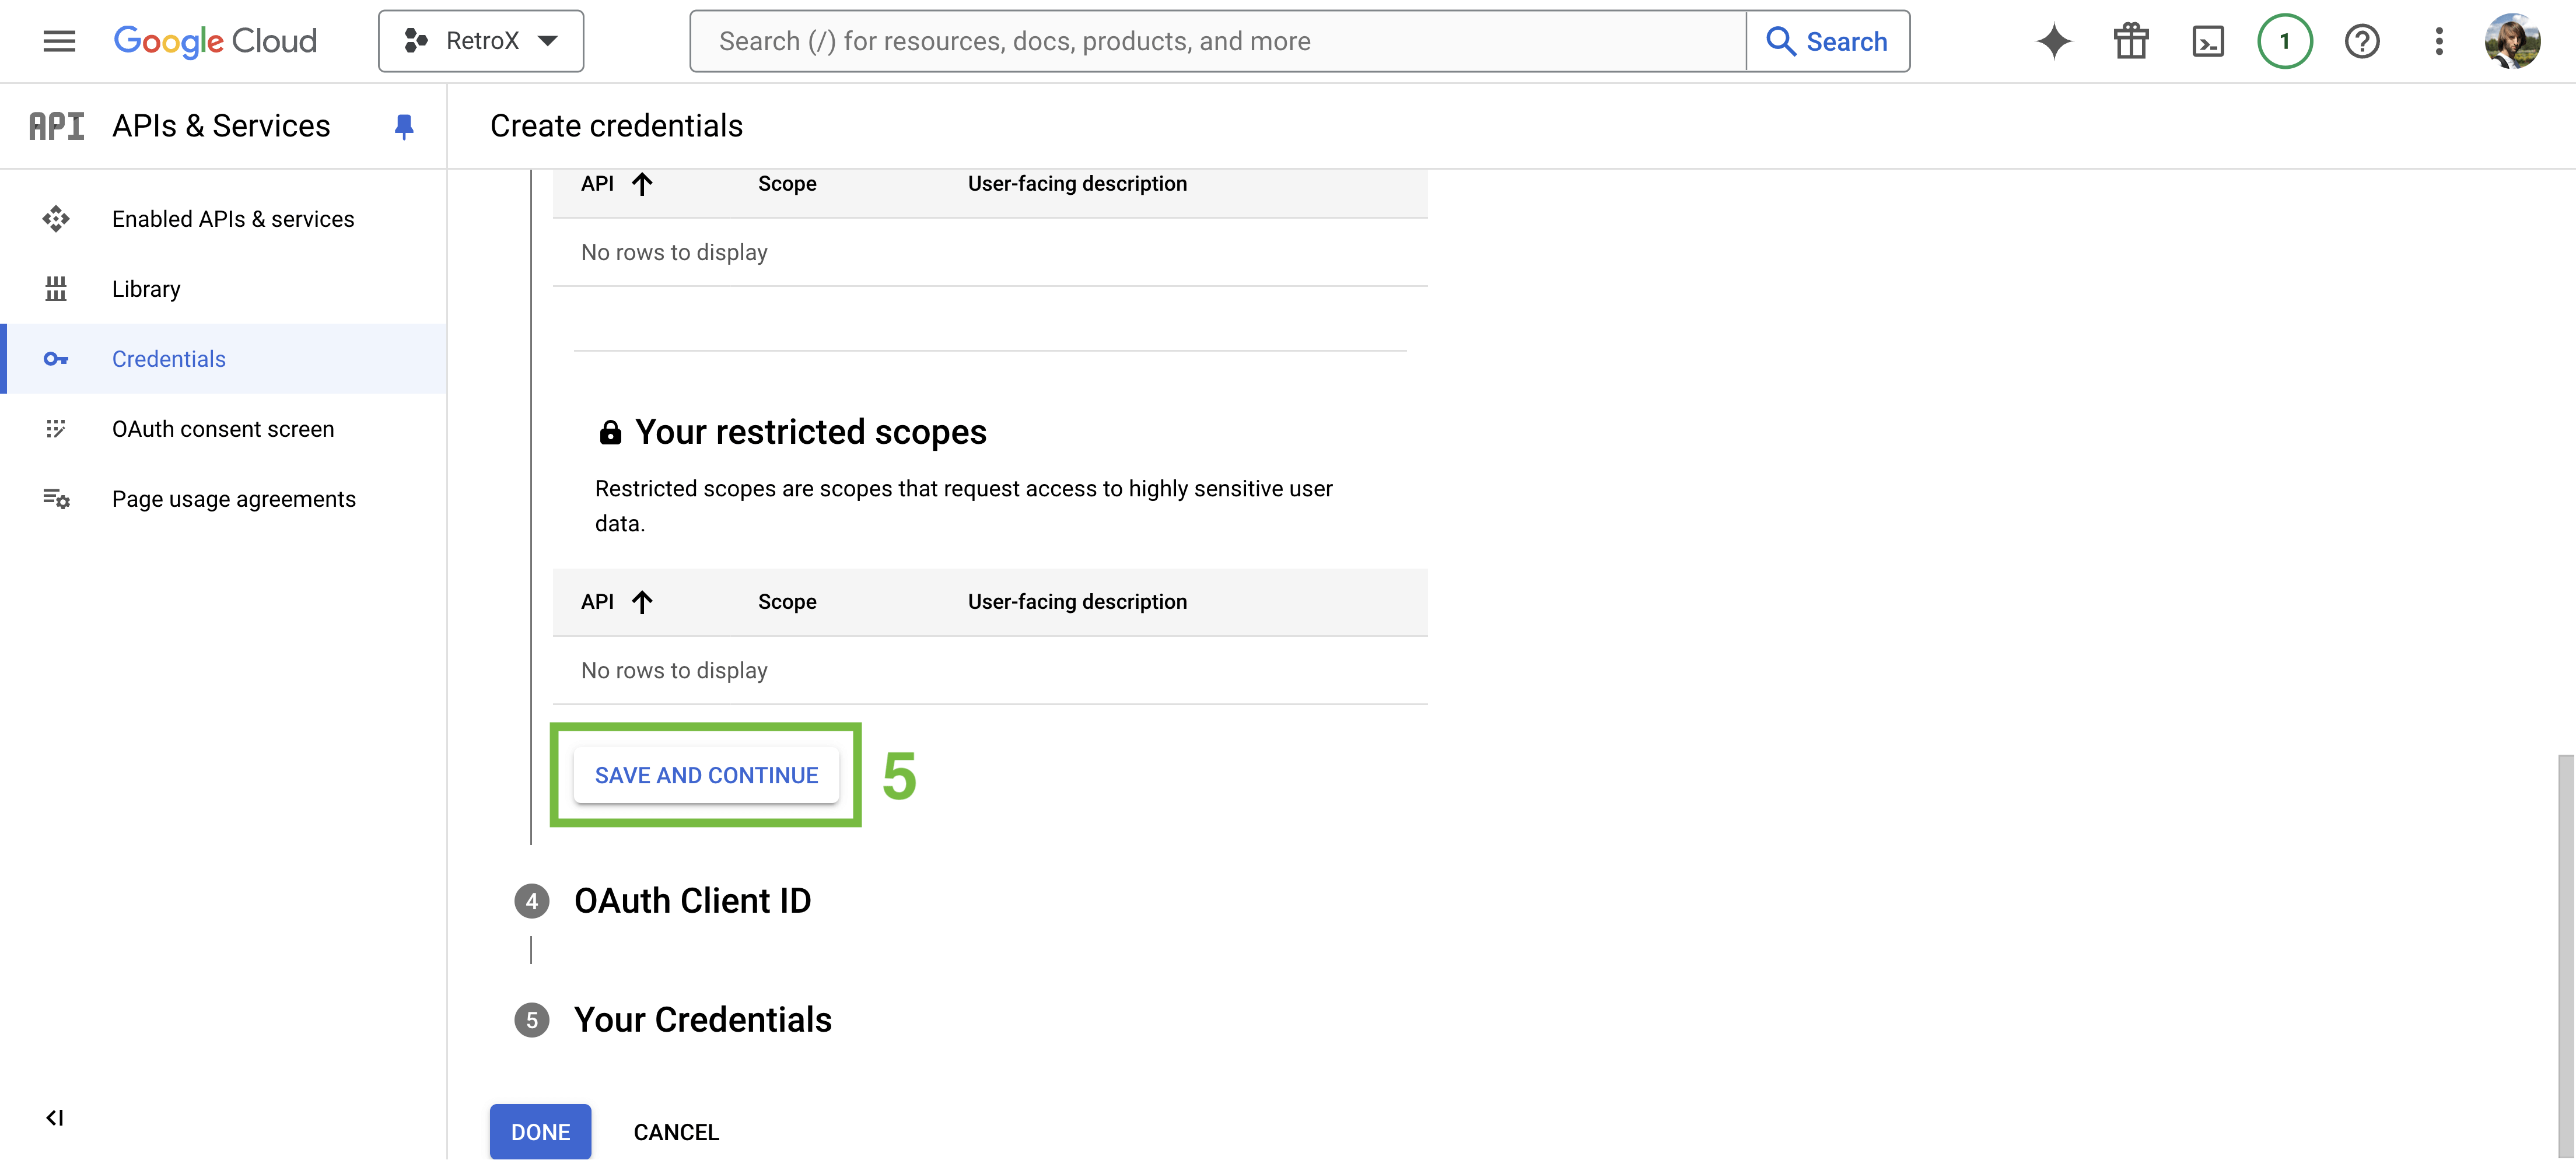
[5] Click SAVE AND CONTINUE.
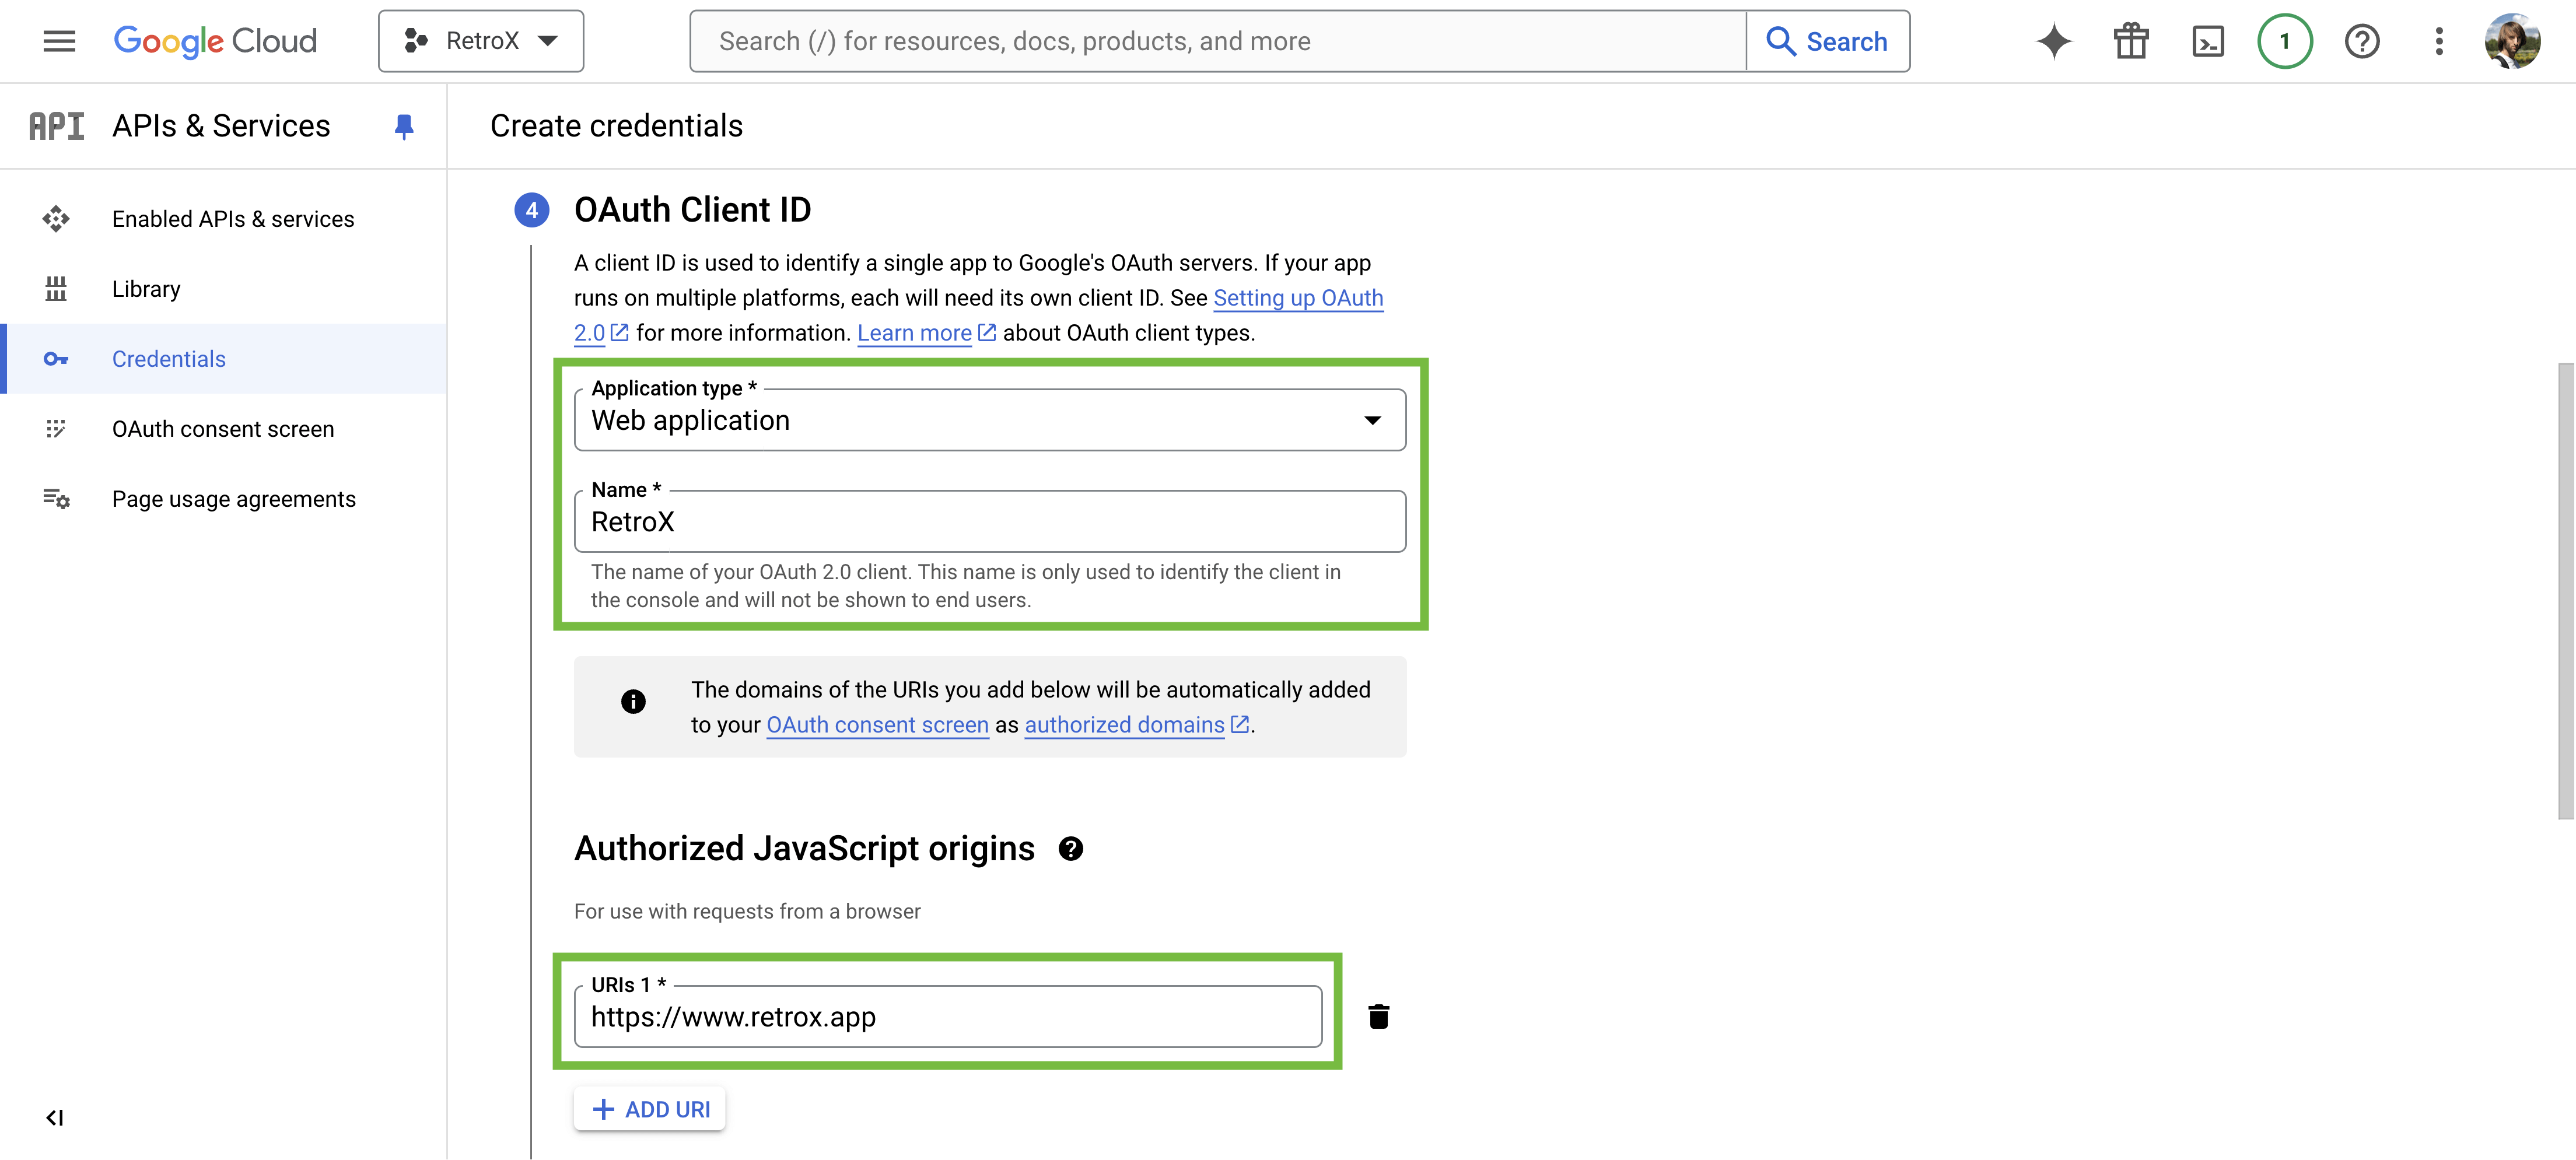
- Choose Web application as the application type.
- Type RetroX as the name.
- Under Authorized JavaScript origins, enter https://www.retrox.app
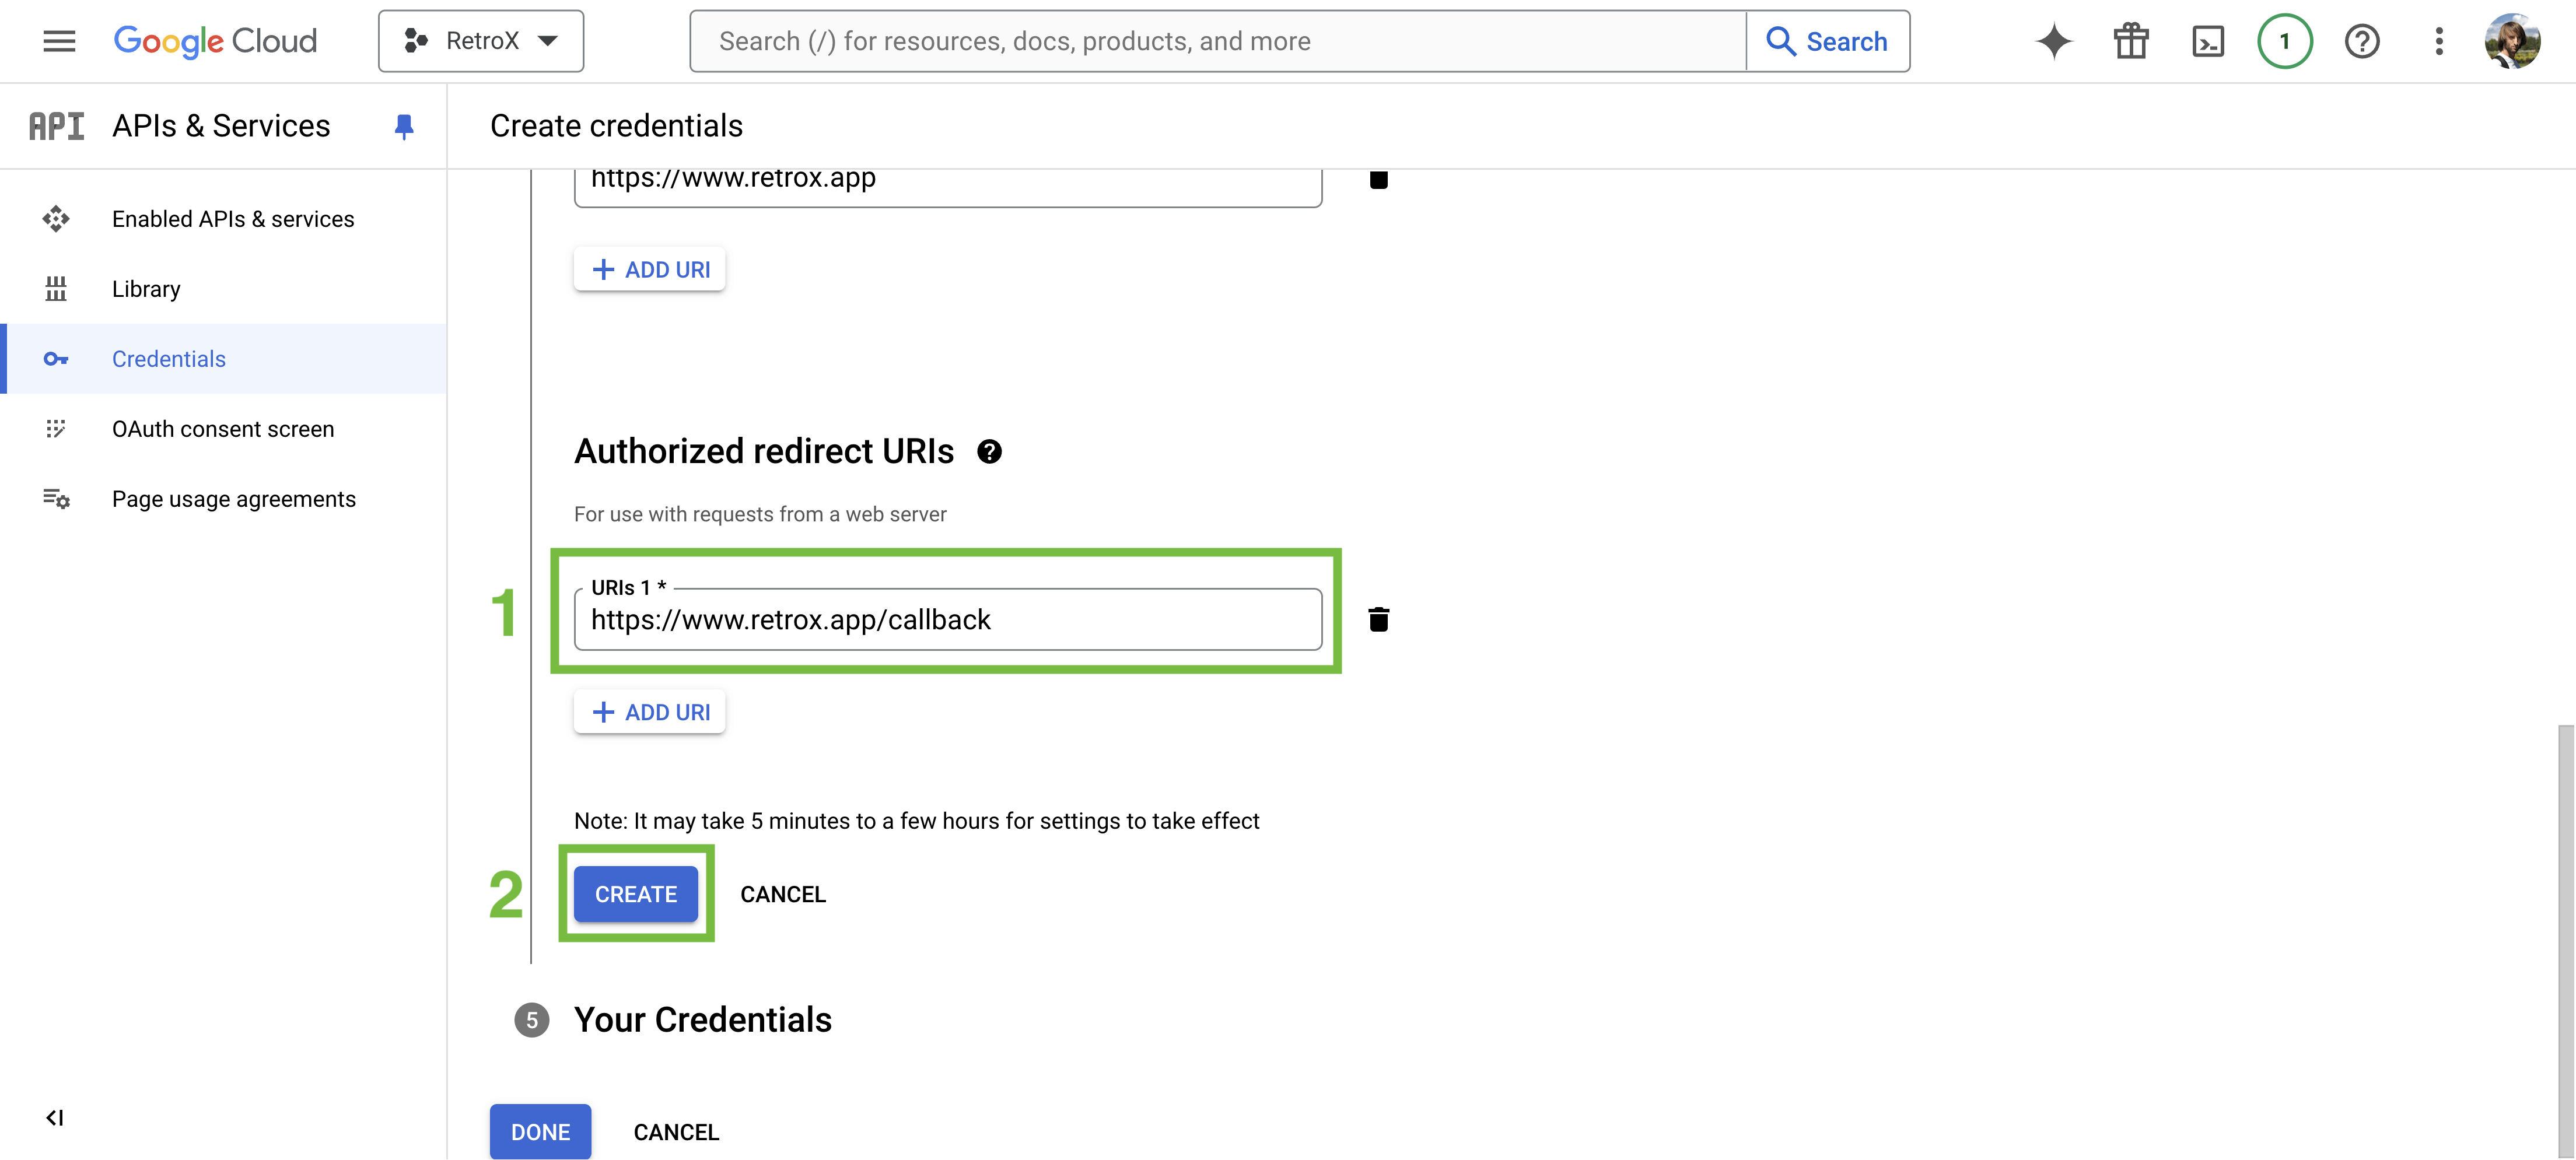
- [1] Under Authorized redirect URIs, enter https://www.retrox.app/callback
- [2] Click CREATE.
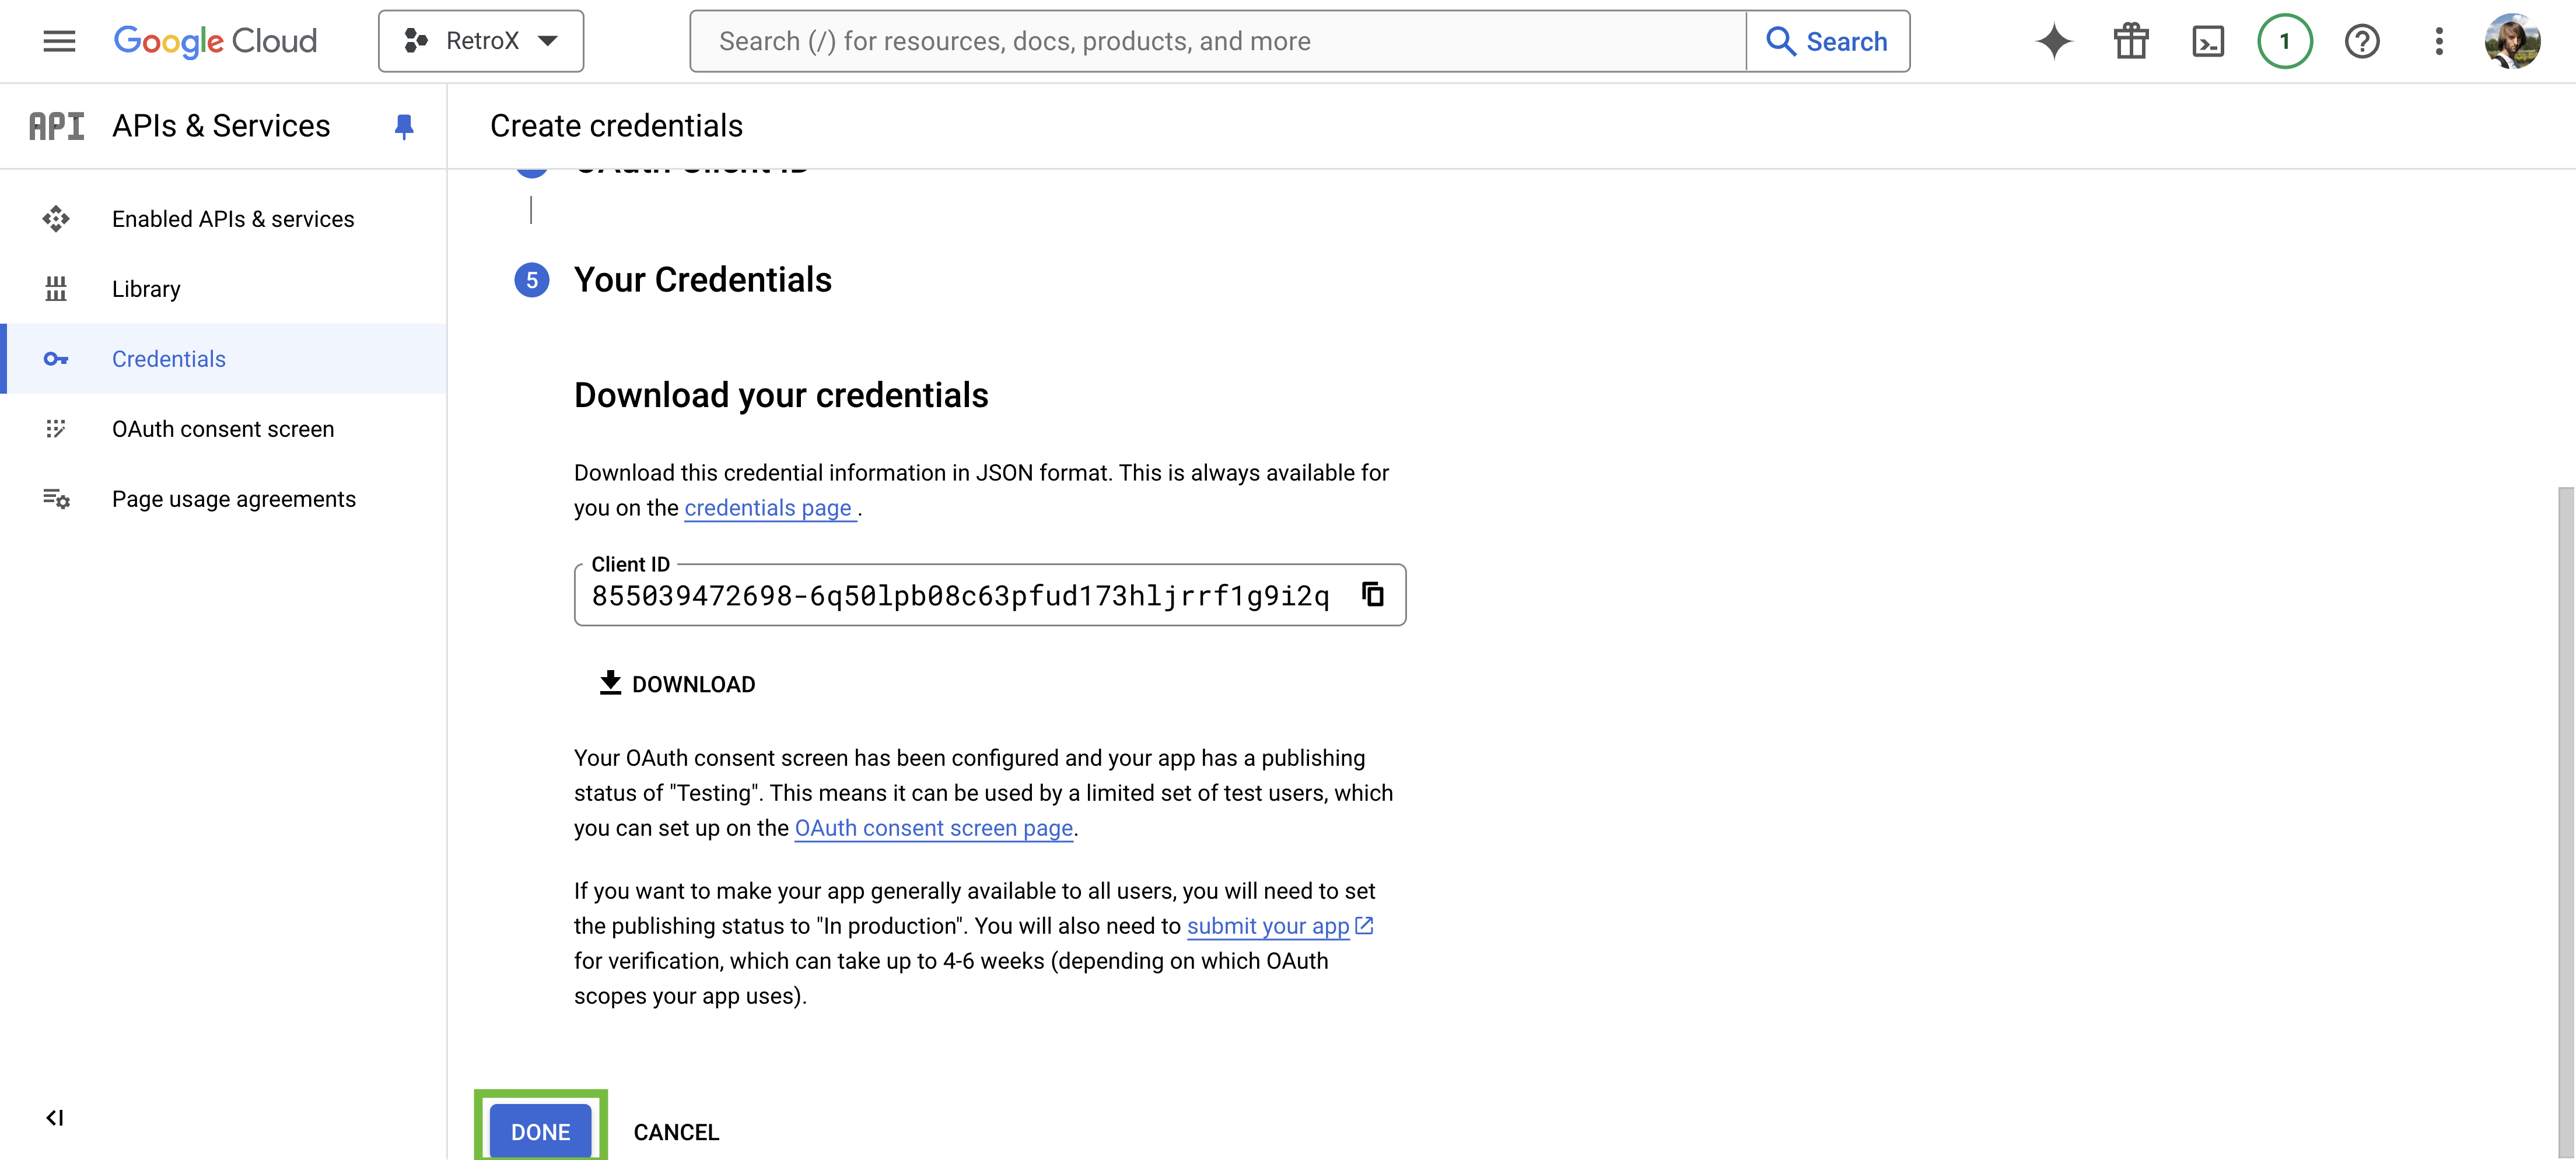
Click DONE.
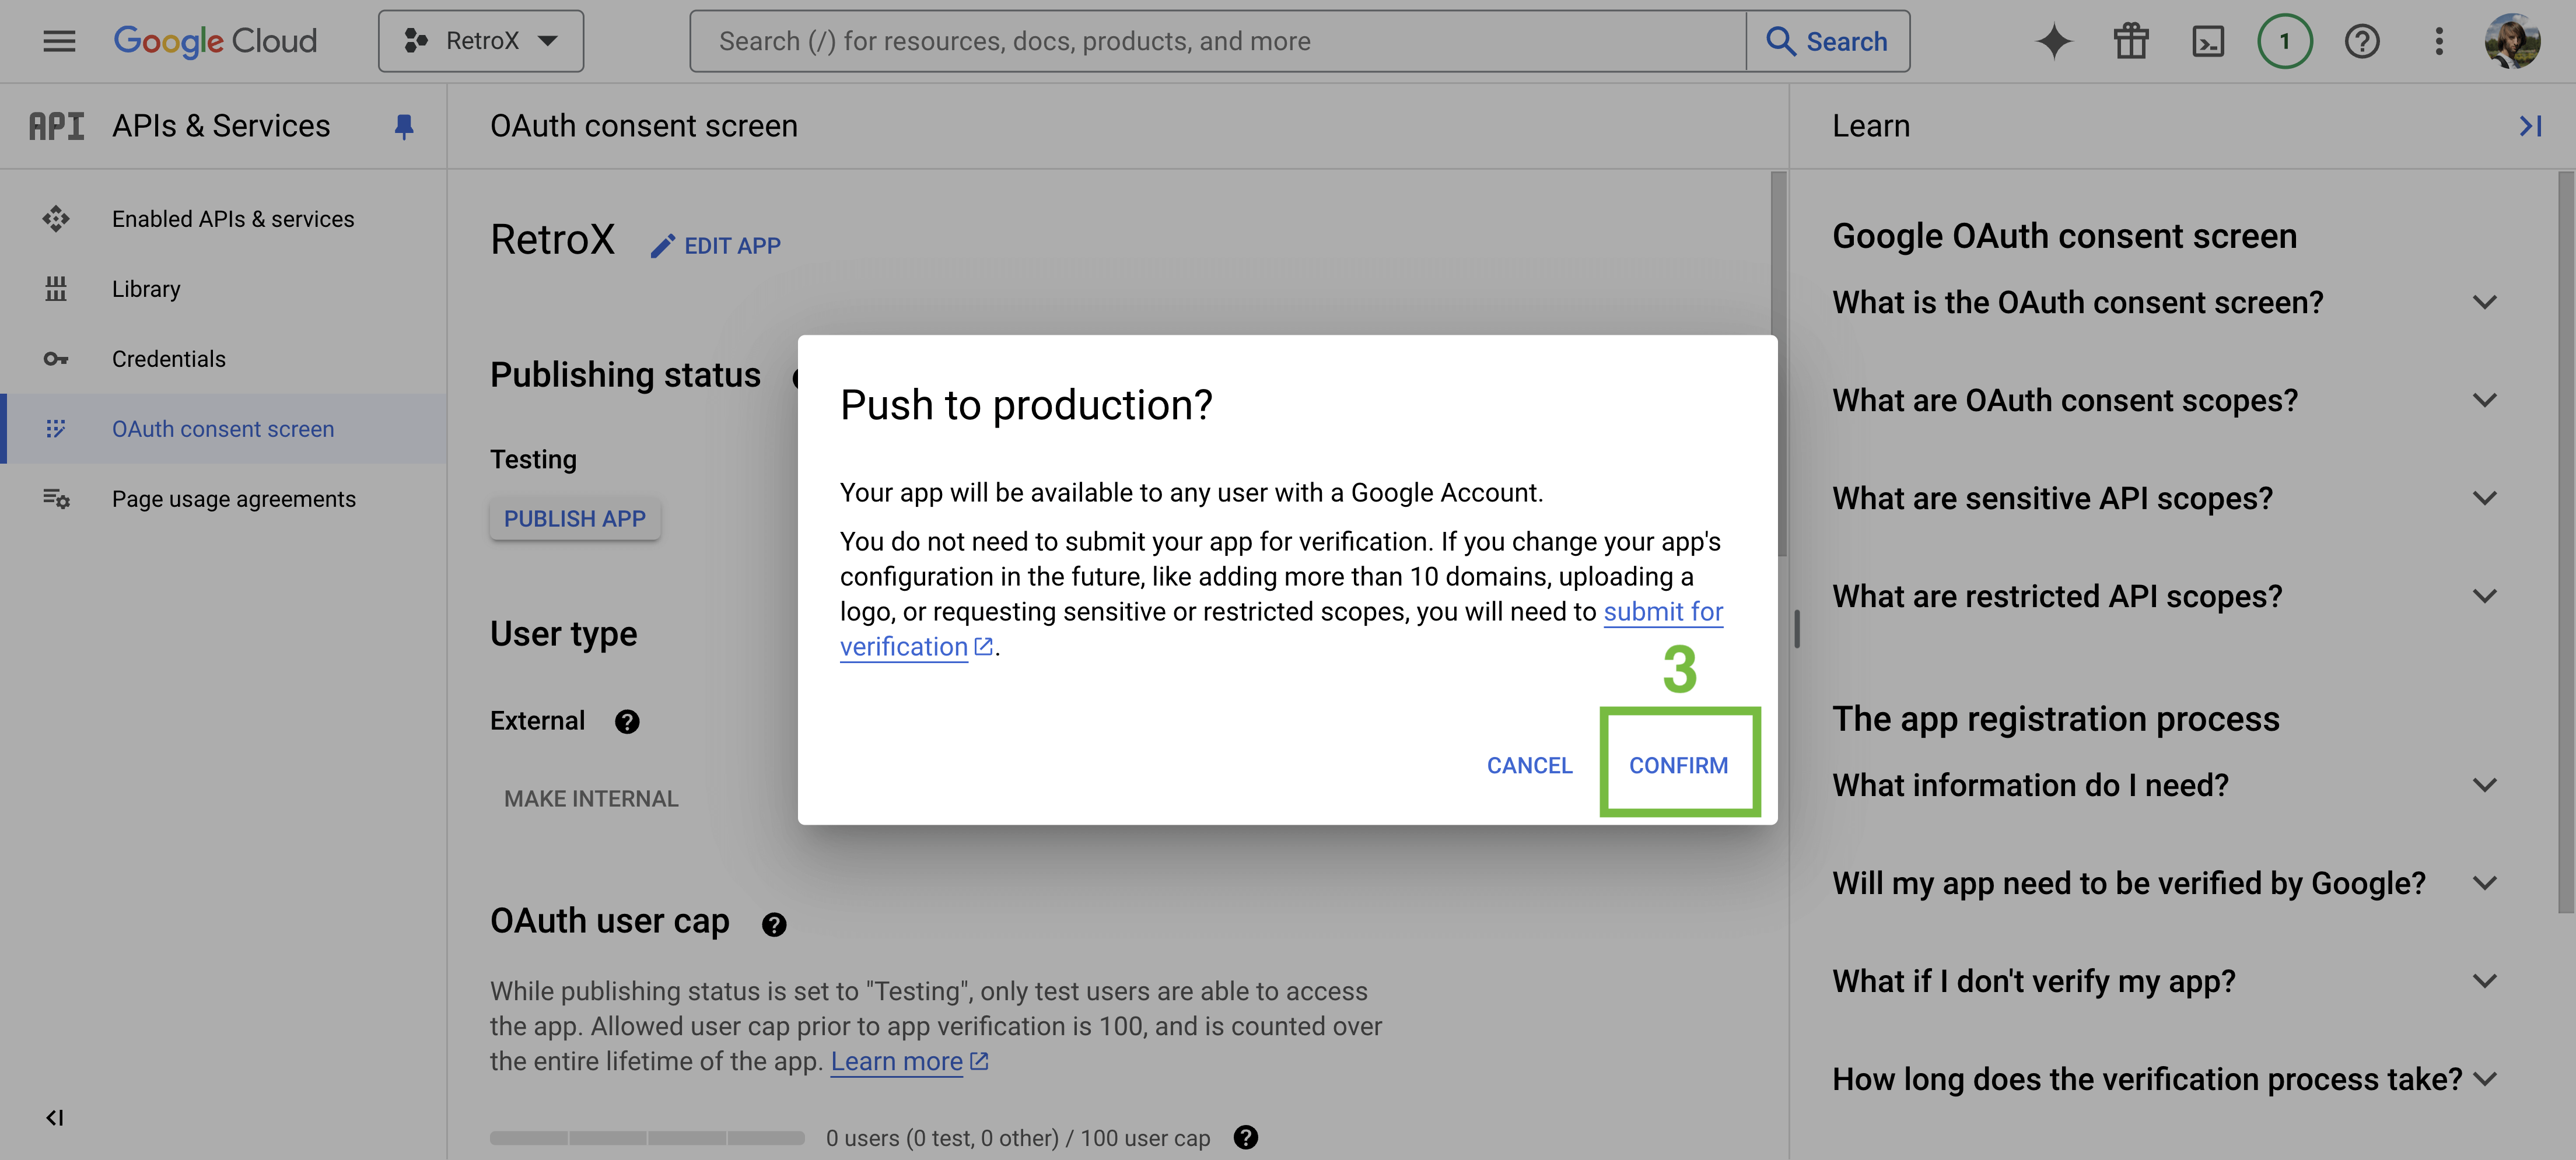
- [1] Go to the OAuth consent screen section.
- [2] Click PUBLISH APP.
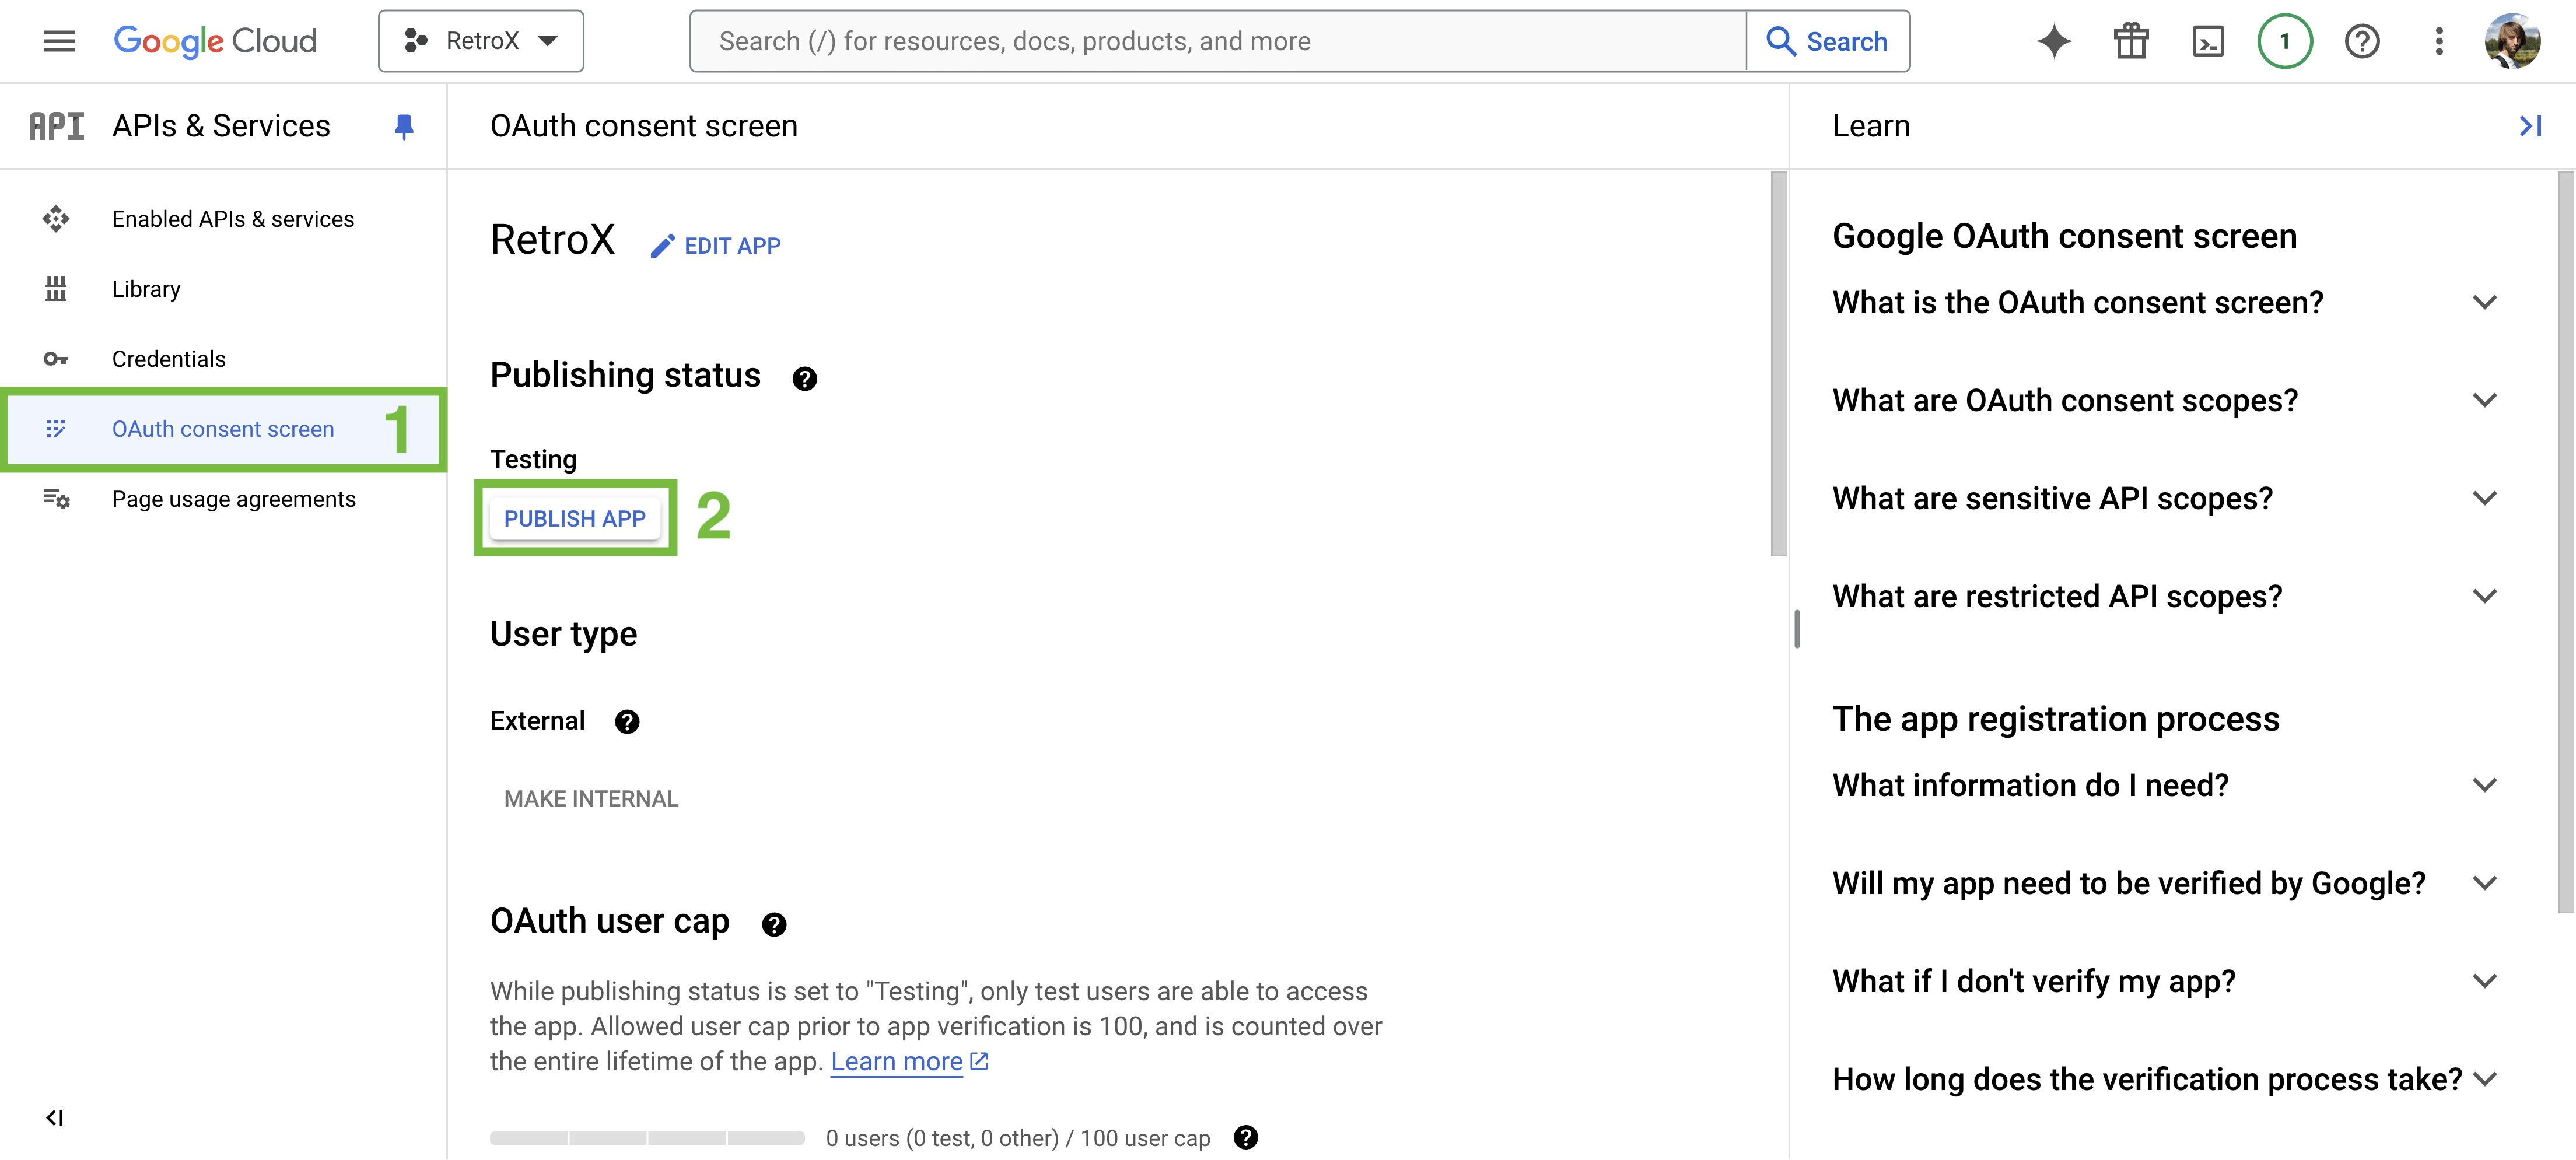
[3] Click the CONFIRM button.
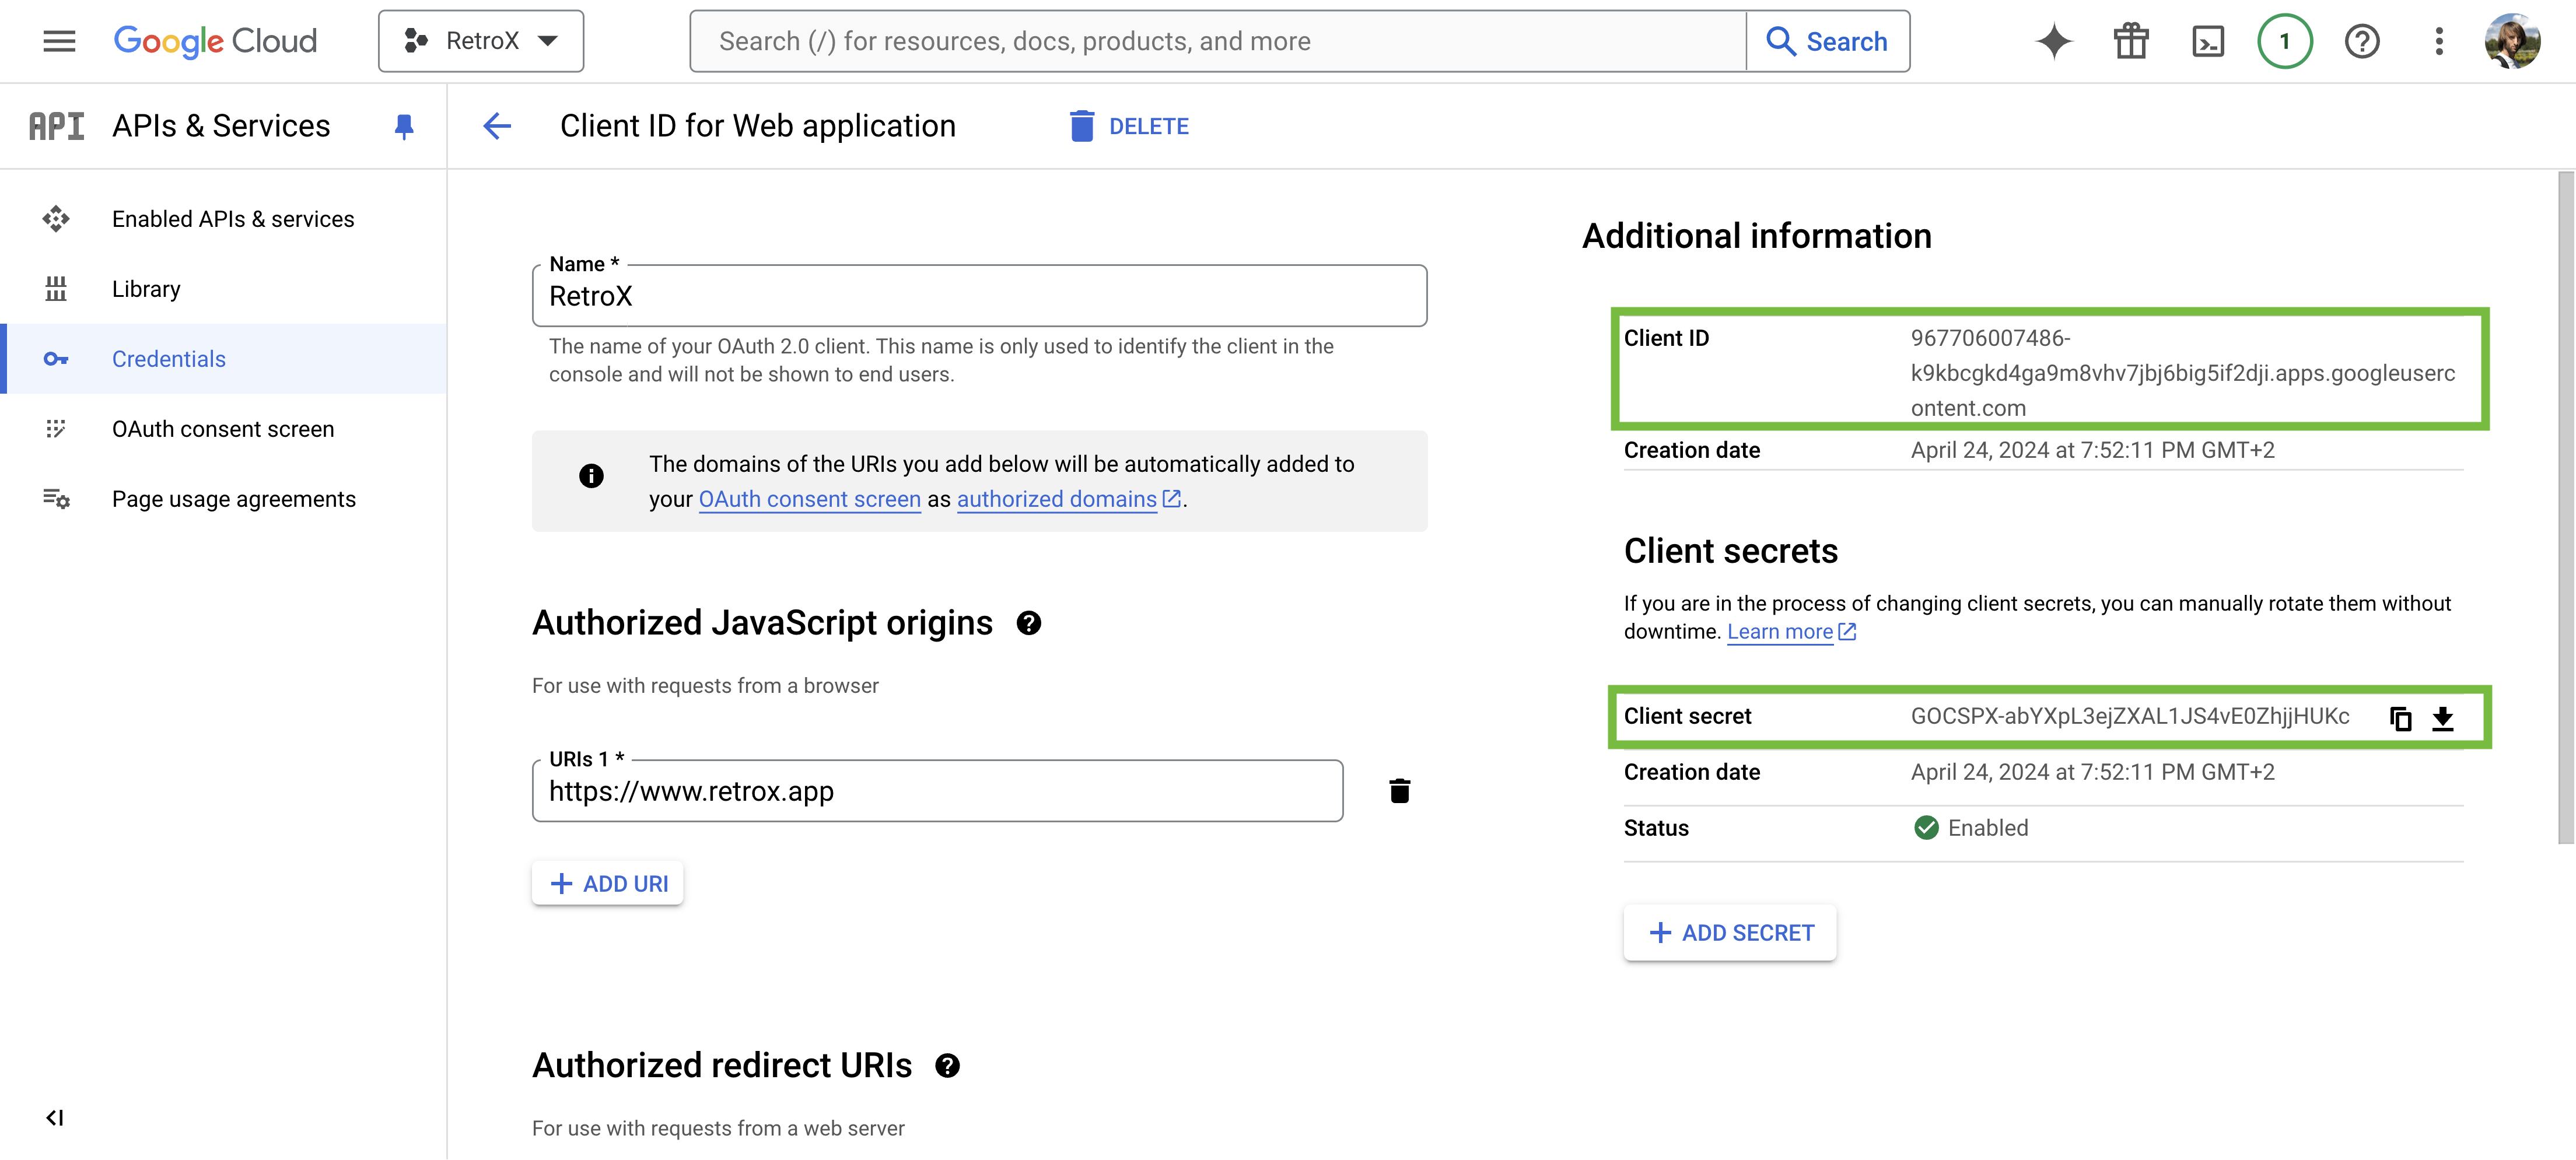
- [1] Go to the Credentials section.
- [2] Click the RetroX option.

Copy the Client ID and Client secret values.
⭐
Almost done!
Enter the values copied from the previous step and click the Save button.